More correctly, what doesn’t happen.

No, you won’t be forced to upgrade.
You can keep using it, but it’s important to understand the risks involved.
One thing we’ve learned from being here before (and before that) is that the risks may not be as horrific as some make them out to be.

Windows 10 end of days
Windows 10 will continue to work after its end-of-support date (October 2025). Applications running on Windows 10 may get updates for some time but eventually will stop supporting Windows 10 as well. To continue to use Windows 10 safely, make extra sure you maintain good security practices and back up regularly.
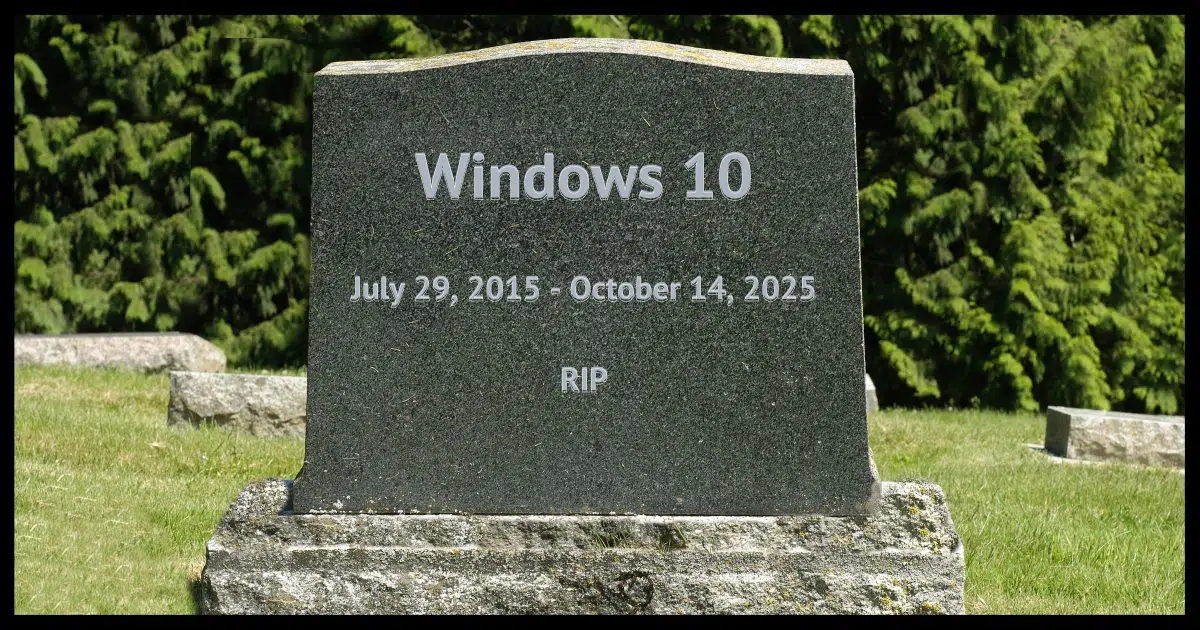
Windows 10 end-of-support date
Windows 10 22H2 will be supported until October 14, 2025.
The only thing that happens when support ends is that no further fixes are available even for security-related issues. In fact, even now, as the date draws closer, security-related issues are the only fixes you’ll get.
It’ll keep working, but whatever Windows 10 looks like on October 14 is what it’ll be from then on. No changes, no fixes, no ‘nuthin.
Help keep it going by becoming a Patron.
Related
 for Windows 10?") Should You Sign Up for Extended Security Updates (ESU) for Windows 10?I'll review the security protection for Windows 10 beyond its official end-of-support date: what it means, pros and cons, and what we know about how to get it -- perhaps even for free.#175852 |
A twist: Extended Security Updates
For the first time, Microsoft is making the Extended Security Updates (ESU) program available to consumers who use Home and Pro editions. Sort of.
And for the first time ever, we’re introducing an ESU program for personal use as well. The ESU program for consumers will be a one-year option available for $30. Program enrollment will be available closer to the end of support in 2025.
For $30, you get one year of additional security updates beyond the October 14, 2025 cutoff date. After that, you’re on your own.
You’ve essentially punted the deadline one year further downfield.
Applications may still get updates
Just because Windows stops being updated doesn’t mean the applications you use will stop sending updates. That depends entirely on the application vendor and when they decide to stop supporting Windows 10.
Some may stop on Microsoft’s date. Others may stop sometime thereafter. You need to monitor updates for the programs you care about.
Someday, those updates will probably stop as well. It’ll be up to you to decide if you care.
Windows Security will still get updates for some time
Think of Windows Security as separate from Windows itself. Just as if it were a third-party application, the scanner may continue to get updates for some time, and the database of malware that it relies on will keep getting updated as well.
Security bugs in Windows itself will not be fixed (unless you’ve signed up for Extended Security Updates), but the security software looking for malware will stay current for some unspecified amount of time.
So what’s the risk?
Good question. The gloom and doom scenario is that there’s an unpatched vulnerability waiting to be found. Hackers will exploit it, and Microsoft won’t fix it.
The more pragmatic risk is that eventually your other software will no longer be updated. You’ll have to figure out whether you can live with it or find alternatives.
The other risk is that when your computer dies, you won’t be able to get Windows 10 for its replacement. Once again, you’ll face the decision of whether to move to the latest, most current version of Windows or switch to something else entirely.
Related

Internet Safety: 7 Steps to Staying Safe Online
Staying safe online doesn’t have to be overwhelming. I'll show you seven practical steps anyone can follow to protect themselves from malware, scams, hackers, and everyday digital dangers.#2374
Mitigate the risks
Perhaps the most important step to keeping yourself safe is to make sure you’re following proper security practices and that your security software continues to work and be updated. If your security software is no longer supported, find an alternative immediately.
Windows Security should continue to receive updates for “a while”. In the past, the Windows security software continued to be updated for some time after Windows itself passed its end-of-support date.
The other important step I recommend is my old standby: regular and complete backups. If something goes wrong, you’ll want to restore to a backup. This will also protect you to some extent when Microsoft eventually takes existing Windows 10 updates and activation offline. That action would prevent you from downloading Windows 10 from scratch, but if you have a backup, you can still restore it.1
Related

Why I Don’t Expect a Windows 10 Apocalypse
Don't believe the FUD; your PC won’t suddenly collapse into chaos when Windows 10 support ends. With updated security tools, smart habits, and backups, you can keep using Windows 10 safely long after Microsoft stops updating it—without fear, hype, or panic.#181353
We’ve been here before
If what we’re experiencing sounds hauntingly familiar, that’s because it is. This is exactly what happened with Windows 7 some years ago and Windows XP before it.2
And in the light of many dire predictions of catastrophe and doom… nothing happened. There were no catastrophic malware outbreaks targeting Windows 7 or Windows XP. There was no list of known vulnerabilities that hackers kept secret until they knew they wouldn’t be fixed.
Nothing.
Windows 7, Vista, and XP users were probably more affected by the decreasing hardware and software support for the applications they cared about.
I expect Windows 10’s “death” to be very similar: a slow fade into obscurity.
Do this
If you’re running Windows 10, it’s time to start thinking about Windows 11. But even if you don’t upgrade, as long as you continue to use your computer safely, you should be fine. Eventually, yes, you’ll want to upgrade because the software you care about stops working, or you get a new machine with a new version of Windows pre-installed.
Until then, subscribe to Confident Computing! More information about Windows 10 as it nears its end of life, as well as less frustration and more confidence, solutions, answers, and tips in your inbox every week.
Podcast audio

Related Video


Footnotes & References
1: I believe Windows XP is in this state right now.
2: To the extent that I began this article by duplicating the Windows 7 version of it.

If you want to keep an installable copy of Windows 10, download a copy from Microsoft now while it’s still available. That way, you’ll still be able to install it from scratch when it becomes unavailable.
Where Can I Download Windows 11? Or 10? Or 8?
Although I already had a Windows 10 ISO from years ago, you reminded me to go download a more recent copy. Well, all I found on the Microsoft website was an ISO creation tool to download. This didn’t work on several machines and was spewing out hex error codes (still). I couldn’t find any solutions on Google. So, I went to my trusty Windows XP machine, and guess what? I was able to download the actual ISOs for both 32 and 64 bits.
So, the moral of the story is that the answer to the question “What Happens at Windows 10 End of Support” is NOTHING. If you can still use it, continue to use it and nothing bad will happen to you. Otherwise, good riddance.
It’s best to download a copy of Windows 10 as close to the EOL date as possible so you, at least, have the latest available version. Windows 8 is well past EOL but it’s still available from Microsoft.
Update: Windows 8 is no longer available for downloading.
I have an old system which has unsupported hardware, with a help of few hacks it’s running Windows 11 fine. I might buy a new motherboard in rime but fir now it’s running great!
Are you willing to share your ‘hacks’?
can you share your hacks to us
Here are a few articles on that:
Install Windows 11 Without a TPM 2.0 or on Older CPUs
Yet Another Way to Install Windows 11 Without a TPM And possibly even an unsupported CPU.
Windows 11 is Not Supported on My Newer PC — What Can I Do?
Is there not a viable alternative to Windows which one (amateur) could begin implementing as a more stable replacement?
There is always Linux, although choosing which distribution (variety) can be daunting. I’ve tried a few myself and for me, I found Q4OS to be very easy to setup and use. It can be installed just as if it’s a Windows application (and removed, too), it detected all of my hardware and has its own application “store.” 99% of the applications are free, so “store” isn’t really an accurate description. Q4OS is also free unless you opt to pay for support. You can select to dual-boot so you’ll be able to choose either Windows or Q4OS when starting your computer.
https://www.q4os.org – Go to the Downloads tab to select which version you want to install.
For other choices, see:
https://www.majorgeeks.com/content/page/best_linux_distro_windows.html
https://www.zdnet.com/article/best-linux-desktops-for-beginners/
https://techviral.net/best-linux-distros-for-windows-users/
https://www.fossmint.com/linux-distribution-for-windows-users/
There will be some Windows applications that won’t run under Linux or a Windows emulator, but there’s almost always a similar application. For example, there are several free MS-Office compatible suites available.
For me, the hardest part of using Linux was learning the differences between it and Windows, and there are quite a few. The Terminal (similar to using the Command Line in Windows) is used a lot and there are lots of commands you’ll either have to remember, or like me, make a cheat sheet. There are Linux forums online, but often the people who are supposed to help the newbies will say things like, “Do your research before you ask.” That’s not very helpful.
On the plus side, there are distros of Linux that can run on old systems with very little RAM.
What constitutes “more stable”?
How much of an amateur? IE: what skill level?
Do you use windows based software?
If you are not using office or are willing to switch to something like Google Docs or open office, you can swap operating systems but beware of the skill level that may be needed.
I have seen articles promoting how simple it is to convert a Windows computer to Chrom OS.
Then you could use the Google online programs to replace the typical Office ones.
I have not found any of the Office replacents to have the features I want, so my computer will continue running Win 10 until I want to upgrade to a new computer.
The largest caveat to using a different OS is that Windows apps will probably nor run successfully although there are alternative programs that do the same/similar things. The largest roadblock will be if there are custom Windows programs (developed by your company) you must use for your job.
With that said, GNU/Linux is a good, low-cost option for an alternative to Windows. There are two distributions I recommend for novice users. They are Linux Mint (https://linuxmint.com/) and Linux Lite (https://www.linuxliteos.com/). I dual boot Windows 11 with Linux Mint Debian Edition 5 (LMDE5) on my production desktop PC. I have an older laptop PC that cannot upgrade to Windows 11. It dual boots Windows 10 with Linux Lite. When Windows 10 reaches End of Life on October 24, 2025, I will remove it from that laptop and run Linux Lite or LMDE5 on it, but I’ll make that decision (about which one) in 2025.
My best suggestion for anyone who is not familiar with GNU/Linux is that you download an iso installation image and use it to install the distribution of your choice into a virtual machine. After you have downloaded the GNU/Linux distribution you have decided to learn about using Linux with, note where it was downloaded (in Windows 10, usually into the ‘Downloads’ folder). You will need to know this later.
If you decide to install a GNU/Linux distribution in a virtual machine, I suggest you get Oracle’s Virtual Box (https://www.virtualbox.org/). It is free, and easy to use. I use Microsoft’s Hyper-V for the same purposes here, but it is not as user friendly as Virtual Box. After installing Virtual Box, run it (I am going to install Linux Lite in Virtual Box to give you guidance). Read the Welcome message, then to install the GNU/Linux distribution you want to learn to use first, click the ‘New’ (blue sun) icon. A ‘create Virtual Machine’ dialog pops up.
Enter the name of the distribution you will install in the Name field.
You can change the ‘Machine Folder’, but I recommend keeping the default.
When I entered Linux Lite in the Name field, the Type field changed from ‘Microsoft Windows’ to ‘Linux’. Make sure that ‘Linux’ is in the Type field. If not, click the drop-down arrow at the right and choose ‘Linux’.
It is safe to keep the default Version setting (Linux 2.6 / 3.x / 4.x (64 bit)).
Click the ‘Next’ button.
For the purpose of learning to use GNU/Linux, the default settings are probably O.K. but I suggest you double your chosen distribution’s minimum system requirements, so since Linux Lite wants 1 GB RAM, I’m going to provide 2GB RAM.
Click the ‘Next’ button.
‘Create a virtual hard disk now’ should be selected by default. If not, select it, then click the ‘Create’ button.
In the Hard disk file type dialog, keep the default setting (VDI (Virtual Box Disk Image)), then click the ‘Next’ button.
In the ‘Storage on physical hard disk’ dialog, I recommend that you keep the default option of ‘Dynamically allocated’. If that choice is not already selected, choose it, then click the ‘Next’ button.
In the ‘Create Virtual Hard Disk’ > ‘File location and size’ dialog, you should see the path to the virtual machine’s hard disk file on your computer’s file system., and its size (8.00 GB (default)). Linux Lite wants 20 GB storage, so I’m going to give it 40 GB. You can go larger if you have enough room on your computer.
Click the ‘Create’ button.
The dialog closes and you are returned to the original Virtual Box window. The virtual machine is created, but we still need to give it the installation/live image it will run to install your Linux distribution.
With your VM entry selected at the left, click the ‘Settings’ (orange gear) icon in the tools bar.
Choose ‘Storage’ at the left.
Under the ‘Controller: IDE’ item in the Storage devices pane, choose the ‘Empty’ device (blue circle) icon.
In the ‘Attributes’ pane (right), click the ‘IDE Secondary Device 0’ (blue circle) icon.
Select ‘Choose a disk file…’.
A Windows Explorer-like dialog pops up named ‘please choose a virtual optical disk file’. If it does not open to the ‘Downloads’ folder (or if you downloaded the image file somewhere else), navigate to the folder where you downloaded the GNU/Linux image file and select it. The dialog will close, and you should see the image file name listed next to the ‘blue circle’ icon under ‘Controller: IDE’. If so, click the ‘OK’ button.
The ‘Settings’ dialog closes.
All that’s left is to install your Linux distribution into the virtual machine by clicking the ‘Start’ (Green Right Arrow) icon.
If you chose to install Linux Lite, choose the ‘direct install Linux Lite 6’ option, otherwise, use the default option for whichever distribution you chose.
Your virtual machine will run slower than your computer. You may have to wait quite a while for your choices to be processed. Be patient! It is safe to choose the default settings for the distribution. Just follow the prompts to install your Linux distribution into the virtual machine. Note that the iso image only ‘sees’ the hard drive in the virtual machine (the hard drive file) so it is safe to tell the installer to use the entire drive for installation using the default settings.
If you are in the USA, choose ‘English’ for the language, then in the next dialog keep the defaults of ‘English (US)’, otherwise choose the options that are appropriate for your language and keyboard type.
In the Updates and other software dialog, I chose to enable both options, Download Updates while installing Linux, and Install third-party software for graphics and Wi-Fi hardware and additional media formats.
For Installation type, I chose Erase entire disk and Install Linux without touching Advanced features, then I click the Install button. Linux Lite asks for confirmation. Read what will be done to your virtual machine. If it looks like what you expect to happen, click the Continue button.
The next screen asks for your time zone (where are you). I use the default New York because I’m in the Eastern Time Zone, so I click Continue.
The next screen needs your user information. Enter your full name, whatever name you want to give to the vm, a username (I use my first name), and a password (twice to confirm). You can choose to require entering the password to log in, or to log in automatically (I choose to require my password to log in). Click the Continue button.
As the installation proceeds, several screens are presented to tell you a bit about Linux Lite. Read them. They are a bit informative.
When the installation is finished, a dialog will pop up telling you so. Click the OK button. In the next dialog, you must click the Restart Now button to reboot your VM. When I did this, the vm stopped responding to my mouse, so I clicked the red ‘x’ (the close button) in to top-right corner of the window, twice. The first time, I selected to tell the vm to shut down. When nothing happened, I re-pressed the close button and selected ‘close the vm’. After forcing a shut-down, I opened settings > storage > Linux Lite 6 > Optical Drive: IDE Secondary Device 0, the blue circle icon at the right, and in the pop-up dialog, I chose ‘Remove disk from virtual drive’, to remove the installation image from the vm. Click OK.
Now you should be able to run your virtual machine and star to learn a bit about using Linux.
Have fun,
Ernie
Running Linux in a virtual machine is one way to do it, but the most common way to try Linux is to install the .iso to a USB flash drive or DVD and boot from that. That gives you a full-blown Linux running directly off the DVD or USB drive without installing anything on your machine. When you are satisfied with that distribution, you can opt to install it on your machine either a dual-boot or removing Windows entirely.
Good day, I’ve used several different search engines looking for how to upgrade from Win 10- 21H2 to 24H1….there’s no link anywhere for that upgrade. I’m assuming one would have to purchase 24H1?
24H1 will not be available until 2024.
I have 2 not-so-old computers that won’t let me upgrade to Win 11 due to lack of hardware/processor support. This has never been a problem for me before, but when Win 10 support dies, do I just throw away two otherwise great computers?
Doesn’t Leo’s article explain all that? Window 10 isn’t going to “die”, like dropping dead on a beautiful crisp fall morning. At least not unless Microsoft intentionally disables it, which it can do because the OS belongs to them, not you. You should be able to use Windows 10 for many, many years after support ends.
No. Install Chrome O/S or some version of Linux ie: Unbutu or Mint.
No. You either keep using Windows 10, or you install Linux.
Start learning about Linux. A good place to start is http://www.distrowatch.org
Still happily running Windows 7 professional on two laptops – a Lenovo and a Dell – no problems.
Always get rid of history and run Ccleaner before shutting down.
The fact that you and so many others have been using unsupported Windows 7 (and XP) without facing a malware apocalypse is a preview of what will likely be the case with Windows 10.
What happens when Windows 10 support ends? I install Linux on all my computers and hope for the best. I do not like the Microsoft Account requirements that Windows 10 has already implemented (try installing/using Win 10 without a Microsoft account — it’s very difficult, but not impossible). But Windows 11 makes it *literally impossible* to install Win 11 without a Microsoft Account.
So, bye bye Windows. I hope SteamOS is stable enough to play all my games by the time I’m forced to give up Win 10 in late 2025. I already use LibreOffice for productivity software, and my Mac for any other work-related stuff, so the only thing I use Windows for is my Plex server and games. As long as I can play games on Linux, I can find Linux alternatives for everything else.
I just purchased 2 new laptops (ASUS & HP) running Windows 11. I had no trouble creating a local account during setup on both machines. I did the same on both my Win 10 laptops a few years ago. Even though Windows wants you to login using your MS account during setup, you don’t need to do that. There’s an option that says I don’t have Internet access. Click that & you’ll get a dialog for setting up a local account. The other way is to actually set up a Microsoft account login during setup. Afterwards, you can create another user account in the settings menu. The dialog will ask for a MS account login but you can click “I don’t have the account information” & it will let you set up a local account instead. Once the local account is created, be sure to go back & make sure it has administrator status. Then log out of the MS account & login to the new local user account. This will let you go back to user settings & remove the MS account user, leaving you with only the local user account.
There are several tech articles on how to create a local account in both Win 10 & 11; just do a search for them on the web. If I’m not mistaken, I think Leo did an article on this very topic a while back. You could search AskLeo.com for it. Hope this helps.
My notebook with Intel Core i7 5500U, 16GB RAM and SSD 512 GB doesn’t the minimium requirements to run Windows 11. Microsoft is a joke. They want to force an upgrade to run a new version of Windows, these fellas must be ashame. In my desktop, I still use Windows 7, very stable and fast and I will continue to use
This happens with all technology, not only Microsoft. I have an iPad, only a few years old, that is no longer able to take updates. One by one my apps stopped working because they became incompatible with the older OS. Some people use a car analogy to explain it, and that works.
I had a 286 laptop in the 80s. It was great. It did everything I needed, and I thought the GUI on a Mac was a gimmick. When 386 computers came out, 286 computers couldn’t run Windows and became obsolete. Should Microsoft have continued to support DOS after Windows became a standalone OS? And the progression continues.
I’m having issues with the reply button, so I don’t know if this will show up in the right place.
Laurence M.: I just recently read this: https://www.reddit.com/r/linuxmasterrace/comments/w7adj3/linux_gaming_good/
Good and current info in the comments about Linux and gaming.
In short, install Linux as I prefer that over Windows as even the small amount of programs/games I play all work on Linux.
but for those mentioning gaming on Linux. the windows games I replay (all offline), some of which are recent and some are old (basically as old as 2002 and as recent as about 2020) all work on Linux.
I suggest using Lutris with Wine (Wine from official WineHQ website) installed paired with GloriousEggroll runner for Lutris (“github[.]com/GloriousEggroll/wine-ge-custom/releases” currently you would download “wine-lutris-GE-Proton7-34-x86_64.tar.xz” and then extract that file to “~/.local/share/lutris/runners/wine” and your games will likely automatically use it when launching through Lutris. if not, you can force it in the game shortcut options by right clicking it then select ‘Configure > Runner options > Wine versions’ section then simply select the ‘lutris-GE-Proton etc etc’ and save it) as that allowed me to play at least a couple of games (Mafia III/Mafia Definitive Edition (this entire series (basically all of from 2002-2020) works on Linux)) that would not work on the standard Wine installation. I know many will mention ‘Steam’ but since I got all of the games I play on my hard drive I prefer to run them through something that’s entirely offline which Lutris does this well.
hell, as a bonus with Linux over Windows on games is that with that Lutris setup I mentioned above on games that do not officially support FSR 1.0 (or better) you can force it to use FSR 1.0 which is a nice way to get a performance boost with minimal sacrificing of graphics. like for example… if you got a standard 1080p (1920×1080) monitor and if your games performance is a bit so-so at it’s native 1080p you can opt to inject a custom res into the game (that’s normally not selectable in the game but will be after this custom tweak) that will make the game itself render on your GPU at a lower res but upscale it to your monitors 1080p res. I use the “1.3x” formula. so converting 1920×1080 to another res using that 1.3x formula it injects a custom res into the game of 1477×831 and then it’s automatically upscaled to 1080p. how you convert this based on your res is the following for 1080p (just adjust accordingly to whatever your res is).
1920/1.3 = 1476.9 (which rounds to 1477)
1080/1.3 = 830.7 (which rounds to 831)
(for 1440p (2560×1440) using that same formula it’s 1969×1108. so it’s like your GPU would be rendering the game at a little over 1080p but give you similar to 1440p visuals is the basic idea)
hence, you input 1477×831 resolution into the games shortcut by doing the following… right click your games shortcut in Lutris then do “Configure > System options” then scroll down to where it shows ‘Environment variables’ and for ‘Key’ put in ‘WINE_FULLSCREEN_FSR_CUSTOM_MODE’ and for ‘Value’ put in ‘1477×831 %command%’ and then save it. now when you startup that game go to the settings and simply find the 1477×831 resolution (this res will now be there when normally this res does not exist within the game) and select it and it will automatically upscale it to your monitors native res of 1080p etc. this is one bonus with Linux that I don’t think exists on Windows.
that forced FSR 1.0 stuff is mainly good for games that don’t have official FSR support and you need more performance as if you can run the game very well at the native res then you probably won’t need to use this FSR stuff at all, but it’s still a nice way to get more performance with not much negative effect on overall visuals. but I heard this FSR 1.0 custom stuff is mostly beneficial for people using resolutions higher than 1080p, like 1440p(2k) or 2160p(4k). but I only have a 1080p monitor.
but on Linux Mint for example, which is Ubuntu based, there is six commands you enter into the terminal to get the most current Wine installed (which is shown here wiki[.]winehq[.]org/Ubuntu as this is the official installation instructions for the most recent version of Wine (I suggest using either ‘stable’ or ‘development’. I am currently using ‘Development’, which is Wine v7.22, but the newest ‘stable’ is v7.0.1 as the ‘stable’ only gets maybe a couple of updates a year where as the Development see’s a update about once every few weeks or so)) but I suggest doing one more command after those six (i.e. ‘sudo apt install wine-desktop-files’) so you get the proper Wine menu entries which makes things a little easier to configure, like ‘Configure Wine’ for example will be in the Wine menu entry (‘Wine > Configure Wine’) which otherwise you have to run ‘winecfg’ from terminal to get same effect.
for non-gaming programs, like Foobar2000 for example (which I think is hands down better for general music playback/conversion than any native Linux software is), I suggest setting it up through PlayOnLinux (sudo apt install playonlinux) since it will run separate from your primary Wine system installation (as the system install wineprefix(sort of like a virtual windows drive but running through wine as performance is much better here than running a virtual machine with real windows) is located at “~/.wine” where as PlayOnLinux is located at “~/.PlayOnLinux/wineprefix/”). there is only a small amount of Windows programs I use on Linux and I set them up all through PlayOnLinux, which are Foobar2000/ImgBurn(CD/DVD burning software) etc.
occasionally ill use PlayOnLinux to install a windows game temporarily, copy the game out of that wineprefix to whatever location you want, then delete that wineprefix and then simply use Lutris and make a shortcut to whatever your games main EXE file is located as this way you are just left with the game files without it actually setting up anything on any of your menu’s etc, which reduces clutter.
basically I have been using only Linux (Mint) on my primary computer since Jan 2019 as it’s nice to get away from all of the Windows drama and Linux is just a smoother/quicker experience to which I think will especially be true on older hardware (while technically it will run on 2GB of RAM, realistically people need at least 4GB of RAM to have a more usable experience on Linux which just about any computer that’s half way decent will have at least 4GB of RAM at this point in time. although I recommend a minimum of 8GB of RAM+ in general for any OS as 8GB of RAM will work well enough for most people in most tasks).
I would avoid dual-booting personally as I would either stick entirely with Windows or Linux, not both installed at the same time to keep issues at a minimum. if you somewhat need both, just setup a virtual machine.
I have a total of three computers (primary desktop, backup desktop, one laptop(the laptop is the worst of the three overall)) and all are running Mint as one of my computers(which has a motherboard that’s high end tech in the year 2005 but I had it since March 2006), in short, cannot run anything newer than Windows 7, so I put Mint 21 on it and it’s great.
Mint 21 (which is supported until April 2027) which was released not all that long ago now comes with the 5.15 Linux Kernel which is basically from Nov 2021 so unless your hardware is really new (say roughly within the last 1-1.5 years or so) it should work well as-is with the 5.15 kernel. but currently if you need to install a newer kernel (it’s suggested to only do this if you really need to otherwise stick with what comes with Mint 21 which is 5.15) you can do that to from terminal as currently there is two more available if needed…
‘sudo apt install linux-oem-22.04a’ (currently 5.17 kernel)
or
‘sudo apt install linux-oem-22.04b’ (currently 6.0 kernel)
then reboot, after booting up, start up terminal and run ‘uname -r’ as this will show you the active kernel version. if you have issues you can reboot, then press either ESC or SHIFT before the Mint OS loads, which will basically bring you to a menu (if you don’t time it right it will kick you to a prompt, then simply type ‘normal’ then press enter then press the ESC or SHIFT quickly after that at which point it will bring you to proper menu to select your kernel), select the previously working kernel, then remove the newest kernel and you will be okay. because if you don’t remove the newer kernel, Linux will automatically boot back into the newest kernel available after you reboot.
at the time of this post there is only one shown in the ‘Update Manager > View > Linux Kernels’ section (which is the default 5.15 kernel), which is where you more typically install kernels on Mint, but eventually the Mint team will offer more here as there usual pattern is once there is more available through here they are only supported roughly 6 months before a newer kernel series is available and the current one you are using goes end-of-life (but the default 5.15 kernel is supported the entire life of Mint 21 which is until April 2027). but like I was saying unless you specifically need a newer kernel for some reason, it’s recommended to stick with what the OS shipped with (i.e. 5.15 on Mint 21).
but (atleast on Mint) if you got a supported NVIDIA GPU you install the proper NVIDIA proprietary graphics driver from ‘Driver Manager’ (currently the ‘recommended’ driver is v515.xx series) as by default you will be on the ‘nouveau’ driver which is not as good performance wise, especially for gaming. if you got a AMD GPU, you don’t have to do anything since the driver is already in the Linux Kernel and just running Mint you are already good as-is.
Thanks for the discussion.
I got a Dell XPS 8910 in 2024 that came with Windows 11 installed. Problems: Several excellent softwares that worked well on Windows 10 Pro could not be installed because Windows 11 had not got them in its database as acceptable software. I am referring to EF Commander, EF Find, Irfanview, that are very efficient for managing the thousands of photos I take. Much more efficient and faster than Adobe Photoshop.
So… I reverted to Windows 10 Pro. I have backups of the OS of Windows 10 on Macrium Reflect. Will that be sufficient if the OS gets corrupted?
I’ve not run into a case where software not “in the database” could not be run. If it’s the message I’m thinking of, there’s a “More info” link that includes a “run anyway” option.
PS: I was able to run/install the programs you mention. If you’re still having problems in Win 11, hit https://askleo.com/ask and we’ll investigate deeper.
I have Irfanview installed on Windows 11. It’s my goto program for quick edits. I got a warning when I installed it, but since I know it’s safe, I installed it.
I, like a majority of people, refuse to upgrade ro any version that has embedded artificial intelligence. If a smart person can remove the A.I. code embedded in Windows 11 Home and Pro, I will buy it from you. It must block Windows Updates from installing ANY artificial intelligence. We consumers should have a choice.
“a majority of people, refuse to upgrade “
I disagree, many might refuse, but most will like the convenience and will go with the path of least resistance, although, I agree, AI should be opt-in not opt-out.
Do you use any Windows programs that don’t have counterparts in Linux? Most people I know can get along with Chrome OS. Linux Mint does much more.
If you’re worried about privacy, I’d stay away from Chrome. Google is just as invasive as Microsoft if not more. I personally am not worried YET.
Indeed, the majority of people will upgrade. And it’ll just work. And you won’t hear from them since things are just working.
I have scoured through the above and nobody mentions a VPN ⛔️
I run Win 10 Pro, if I move to Linux can I take my paid-for VPN with me ?
Most VPN providers offer support for Linux. Make sure yours has a Linux version or find one that does.
Hey there Mark
Many thanks for your contribution.
I will check this out coming up to October time.
You should be able to use. But of course you could also just ask your VPN provider. They’ll have a definitive answer.
Hello. I am having trouble installing windows 11 on my laptop, even though it meets all system requirements. I think it is because Windows 10 support has ended. Do you know if this may be the case, and if there is a way to fix it? I have the most recent version of Windows 10 on my laptop. Thank you. It says in some of the information about Windows 11 that you have to have a supported version of Windows 10 to install Windows 11.
That’s definitly not the reason. Your copy of Windows 10 must be genuine and activated. It doesn’t matter if support has ended. It has nothing to do with Windows 10 being no longer supported.
A couple things to try:
How To Get the Latest Windows 10 Update – Ask Leo!
How to “Reset this PC” to Reinstall Windows – Ask Leo!
Windows 10 end of support should not affect this. Is your Windows 10 activated properly?