One option is to use Windows’ built-in tool.
When it comes to protecting yourself from almost anything that could go wrong, nothing is more effective than to periodically make an image backup of your system — a Windows image backup. An image, by definition, includes absolutely everything on the hard disk, and can be used to restore your system after replacing a broken hard disk.
There are many different ways to do this. I have other articles discussing some of the other tools available. However, Windows includes a built-in image backup tool. I’m not a huge fan of it, it is better than nothing, and you don’t need to install anything to use it.
We’ll make an image backup using the Windows 7 backup tool in Windows 11. Let me show you how that works.

Making a Windows image backup
- Search for Control Panel
- Select ‘Backup and Restore (Windows 7)’
- Choose ‘Create a system image’
- Select an external hard drive as the destination
The time it takes varies based on the amount of data you have to back up and the speed of your drives.
Finding it
Click on Start and search for “control panel”. Click on that when it shows.

In Control Panel, search for “backup”.
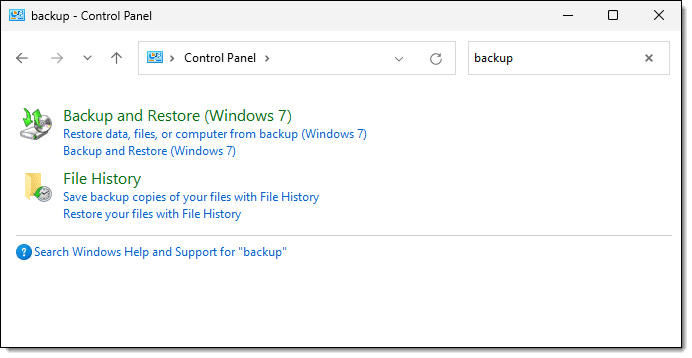
Click on Backup and Restore (Windows 7).
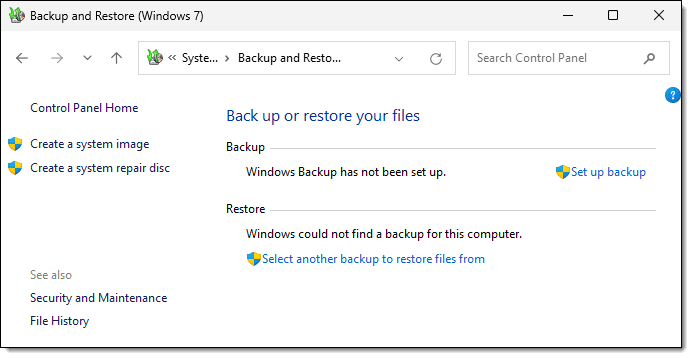
Creating the Windows backup image
Click on Create a system image on the left. This will open a dialog asking where you want to save the backup.
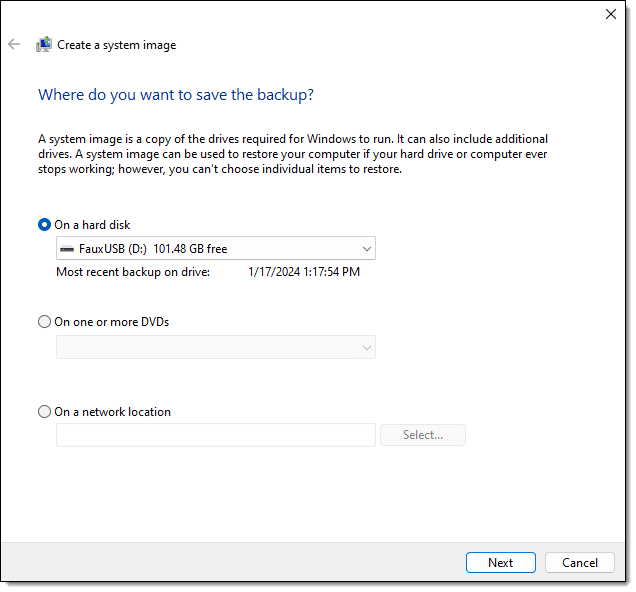
I recommend using an external hard drive. The “On a hard disk” drop-down will list all the available disks connected to your computer on which the backup can be stored. Select your external drive and click Next. A confirmation window is displayed.
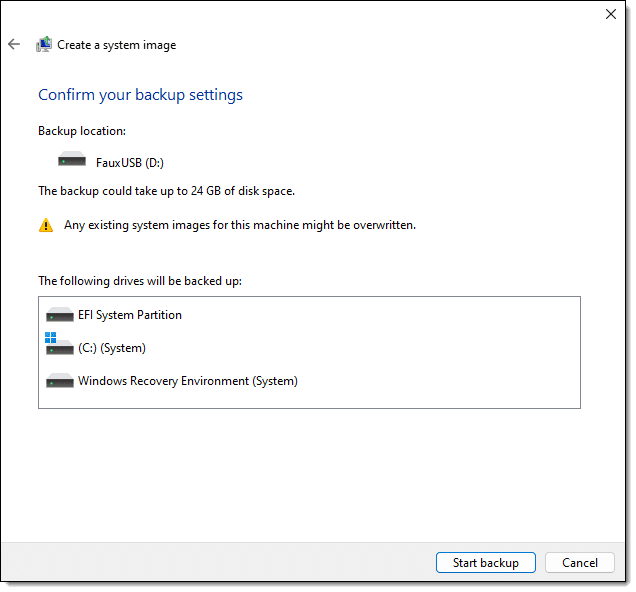
This lists the selections we’ve made along the way with some additional information. In the example above:
Related
A counter argument

Don’t Use Windows Built-in Image Backup
The Windows 7 Backup and Restore tool is still present in Windows 11, but that doesn't mean you should use it.#155457
- We’re placing the backup on my “Faux” USB drive, D:.
- It could take up to 24GB of space (depending on the amount of data stored on your system).
- The three partitions on the hard disk are selected to be backed up.
Click on Start backup.
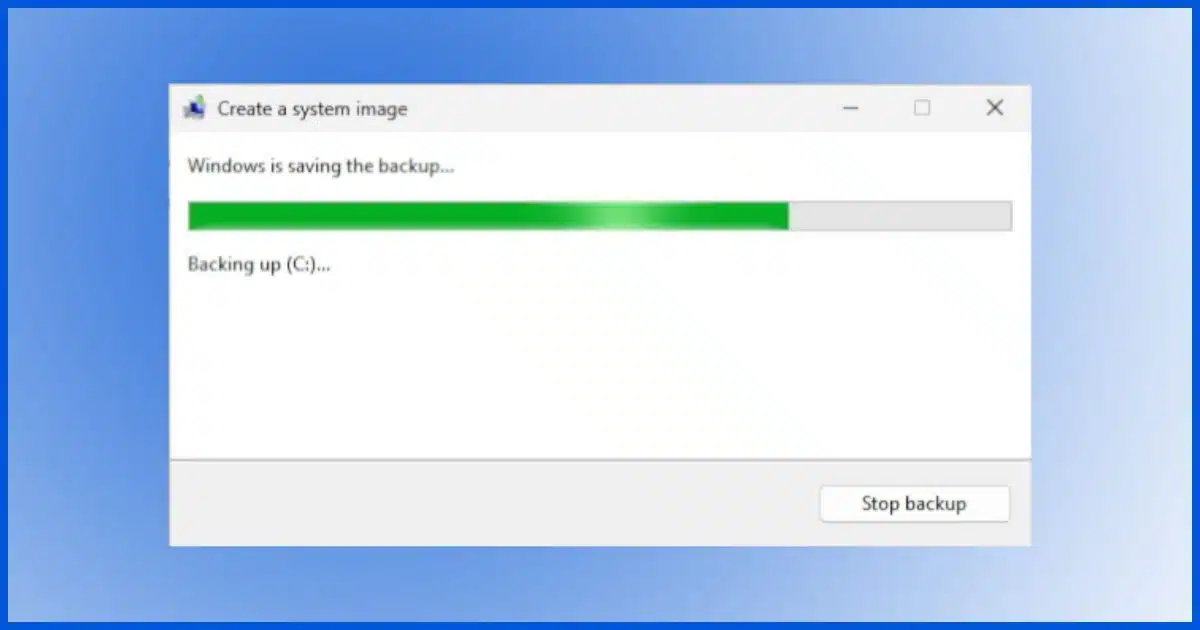
Backing up
Exactly how long this backup takes depends on several factors.
- How much is stored on the drive
- The speed of the drive
- The speed of your backup drive
- The speed of the interface to the backup drive
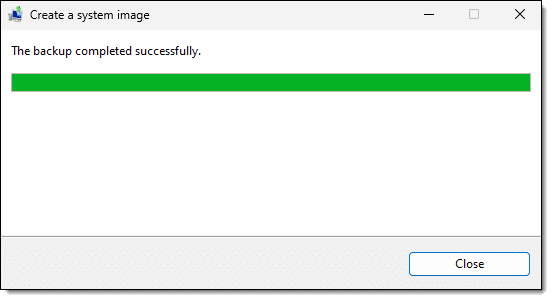
Eventually, the backup is complete.
You may be asked if you want to create a Repair disc.
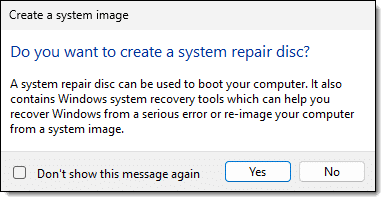
This is the disc (or USB stick) you would reboot from in order to restore the image we’ve created. You don’t need to do this now. I have an article on creating one later.
The Windows backup image has been created.
Do this
Having made an image backup, you now know that if you ever run into a problem, you can revert your entire machine to the state it was in at the time you took this image backup.
There are other tools to do this that I prefer because they give you more flexibility and visibility into exactly what’s happening when you back things up.
But again, this is better than no backup at all and doesn’t require any third-party download.
If you find this helpful, why not subscribe to Confident Computing? Less frustration and more confidence, solutions, answers, and tips in your inbox every week.
Podcast audio

Related Video


We had been using the free version of Macrium Reflect so was interested to read this article, timely as always.
I noted your link to other tools took us to your article on EaseUS Todo free, which you appear to like.
If we decide to change our back up choice to either Ease US Todo or to use the Windows Image tool is it safe to keep the Macrium Reflect app on our computer, or would that be insecure now that security updates have come to an end for the free version?
I guess I am asking if it would be insecure to either continue using Macrium Reflect Free, or even just leaving it on the computer, but no longer using it?
I believe it’s safe to leave it on the computer, if you have some reason to.
If you have a Macrium Reflect rescue disc, there’s no need to keep Macrium Reflect on your computer. The rescue disk contains a live Windows or Linux OS and when booted runs the backup program. You can even use the rescue disc to perform a backup.
The downside is that you have to reboot your computer from the rescue medium to run it.
Thanks Leo.
I guess I thought I would need to leave the app on the computer for if I ever needed to use the saved back up after some issue occurred and I needed to get back to a good spot.
Your comment makes me think I don’t? It will just work without the app?
If you want to use a Macrium Reflect image later, then you’ll either need Macrium Reflect installed, or a Macrium Reflect emergency/rescue boot disk. You can leave it installed, or install it again later when you need it, or create an emergency disk for use later.
Macrium Reflect is not particularly prone to security risk issues, but the best approach is to use the ‘Create the Rescue Media’ option [that is, build a bootable copy of Reflect on a USB stick – it only needs 8GB].
You’ve now got the security risk free version of the Software [difficult to attack, if it’s in your drawer] that you can recover images [fully, or selected files therein] for as long as you need to …
Hello! One caveat…
I just did this procedure and the first backup drive I tried to use was formatted with exFAT. Windows got an error and said the drive has to be formatted with NTFS. Changed to a NTFS formatted backup disk and all worked well.
Also the repair disk had to be burned to a CD/DVD… no option to make a bootable thumb drive repair disk, which is what I would have preferred.
I did the same as above but it said my thumb drive was not a valid location.
any help with this? Thanks
After years of using Acronis True Image to create a weekly backup image of our “C” drives, we switched a few months ago to Macrium Reflect and will likely never return to Acronis. I tested at least 6 back up applications and landed on Macrium Reflect.
Sure, Acronis and many of the others are easier to use than Macrium, but our motivation to switch was (1) Acronis changed to a subscription model and no longer offered a perpetual license) and (2) all the kinks in Acronis including its fussiness which often resulted in backup images being unable to be restored. While Macrium too is a subscription, it’s less expensive and, by golly, it works a whole lot better than Acronis. Macrium not only makes backups much more quickly than Acronis, but they are easily restored and Macrium isn’t so fussy about them. As a bonus, Macrium enables us to schedule a daily back up of our Thunderbird email profiles which keeps them safe and sound in case we have a rare corruption to the profile. All in all, I’m happy so far with Macrium, although nobody else in our small office would have a clue how to set it up.
I am trying to replace the system drive with another drive and then use the previous boot/system drive as a data drive (for games, photos, etc.)–because it’s larger and having a slim-downed boot/system drive seems like a doable and likeable thing to do and the data drive would give me a lot of room.
Using EaseUS Backup program, I ran a backup of both the whole drive and just the system. The destination drive is clean and initialized. I have a 32GB USB drive as a recovery disk so I’m following your sage advice up to this point.
Am I trying to bite off more than I can handle?
Sounds good to me.
I just purchased a NEW Dell laptop with Windows 11 Pro.
In order to have a “factory state” copy of my entire hard-disk, I used the aforementioned Windows built-in tool.
One question though —
My C drive is 50GB filled up, but the “system image backup” is ONLY 21GB.
1) Is this huge difference in the Sizes of source & backup, normal & acceptable?
Or, did something wrong happened & I need to do the backup process again ?
2) Please suggest the Best, Latest & most reliable software (paid or free, doesn’t matter), which supports “optical media backup”, and fulfills my requirement of :-
Creating a clone of entire hard-disk, so that my PC can be restored to its “factory default state”, just like a newly purchased PC.
Note: I heard that there are some issues with Macrium. Maybe I heard wrong, please guide me.
It’s normal for the backup to be smaller, even much smaller than the data on the backed up drive.The size difference is normal, due to compression and exclusion of non-essential files such as swap files and hibernation files.
We actually recommend against the Windows built-in backup. It’s better than nothing but it’s so poorly documented, we recommend a third-party backup like, EaseUS Todo, Macrium Reflect, of Paragon backup. Even Microsoft recommends a third-party backup.
We also recommend not using optical media because it’s more expensive in the long run and more unstable than a magnetic HDD,
If you have recently purchased a Western Digital external hard drive, there is a version of Acronis specific to the Western Digital environment that is free for 5 years. It is missing a few features in the full Acronis product: the anti-virus capability, the capability of specifying folder exclusions, and the ability to clone a disk. This allowed me to save the annual subscription expense. I hope the bare-metal restore feature still works in case I ever need it!