When you need to completely start over.
To reformat a computer is the equivalent of erasing a messy chalkboard and starting over with a completely blank slate.
To reinstall Windows is to fill up that chalkboard cleanly with new information. That means erasing the hard disk and starting over with nothing.

Reformatting and reinstalling Windows 11
Reformatting and reinstalling Windows is a drastic measure used to fix problems or clean up by erasing everything on the hard disk and starting fresh. It starts with a backup; then you erase and reformat the hard disk, which you can do in Windows Setup; then you reinstall Windows, reinstall applications, and restore your data.
Related

Five Steps to Repair Windows 10 Without Losing Programs
Before you give up and reinstall Windows, try to repair Windows 10 without losing programs.#122708
Reformat and reinstall
Reformatting a machine and reinstalling everything to start over is typically a five-step process.
- Back up.
Take an image of the existing machine This saves all current content in case you need it later.
- Reformat the hard disk.
While “reformat” refers to a specific operation, in this situation, it refers to any technique used to erase or overwrite everything on the hard disk.
- Reinstall Windows from scratch.
This typically means booting from a Windows setup disk and letting the setup program do its thing.
- Reinstall applications.
Windows on its own isn’t enough; you’ll need to reinstall additional software. We won’t cover that step here, since it varies dramatically depending on what applications you use.
- Recover your data.
You can do this from the backup image you started with in Step 1 or from other sources; it depends on how you organize your data.
I can’t stress the importance of Step 1 enough. We’re about to erase everything on your hard disk. Unless you know for certain there’s nothing there you need from it, an image backup is the right way to be prepared when you remember some weeks from now that you forgot to save a specific file.
Help keep it going by becoming a Patron.
Related

How Should I Wipe My Windows Hard Drive Before Giving It Away?
Giving away your old computer is a great idea, but handing over your personal data along with it is not. I'll show you the difference between a wipe that works and one that just looks like it does.#11567
(Re)Formatting
The term formatting goes back to days when hard disks had to be physically prepared before data could be written on them. Formatting set up the underlying magnetic information so the disk could be used. The term also referred to the next step: setting up the initial data to organize the files and folders to be added later. That last step — setting up the initial data on the disk — makes anything that was on the disk inaccessible. As a result, reformatting came to mean exactly that: erasing the disk by setting up new initial data structures.
For the purposes of reinstalling Windows from scratch, all we really care about is that the disk be erased. The easiest approach is to let Windows Setup do that for you. The “trick”, if you want to call it that, is that it’s not always obvious what to do in Windows Setup. So I’ll show you.
Starting setup
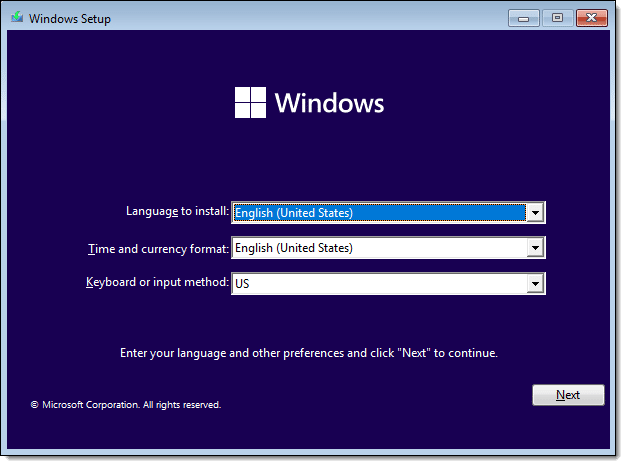
The first step is to boot from your installation media. How you do that varies dramatically depending on your specific computer. If your computer has the UEFI BIOS, which includes things like “secure boot”, this article applies. If your computer is older and has a traditional BIOS, check out this article. Once you boot, you’ll be asked to choose your language and keyboard; then click Next.
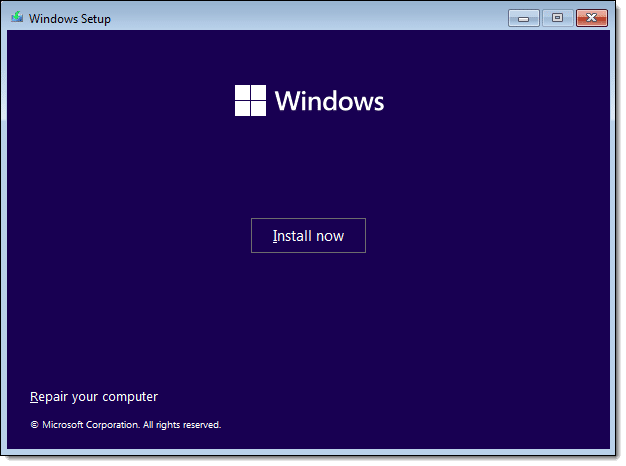
The setup program will run. If you have a product key, you can enter it here or click on I don’t have a product key to do so later. Click on Next.
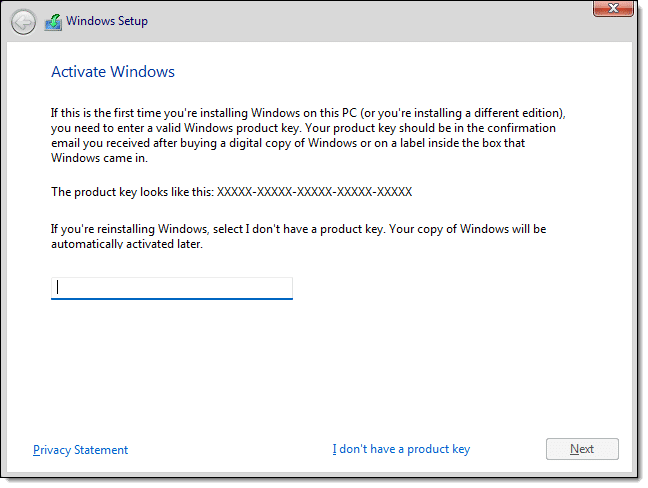
Note that if you’re reinstalling a previously installed version of Windows, you may not need an activation key. Even if you do, it’s OK to click I don’t have a product key. You’ll be asked to activate it after the system is installed and running. Next, select the version of Windows you want to install.
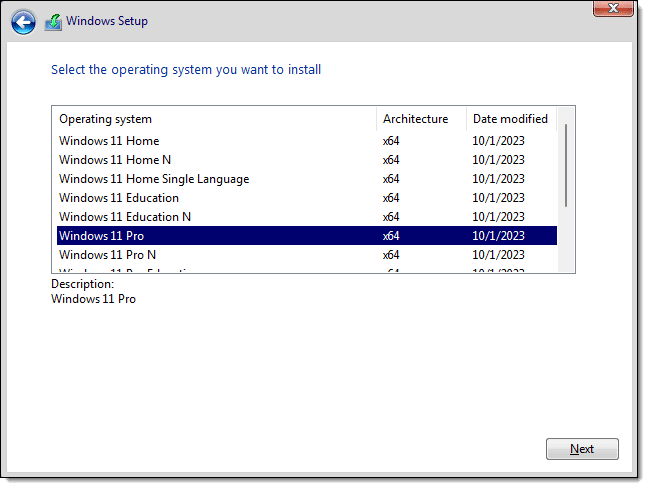
Unless you know otherwise, choose Windows 11 Home or Windows 11 Pro as appropriate.
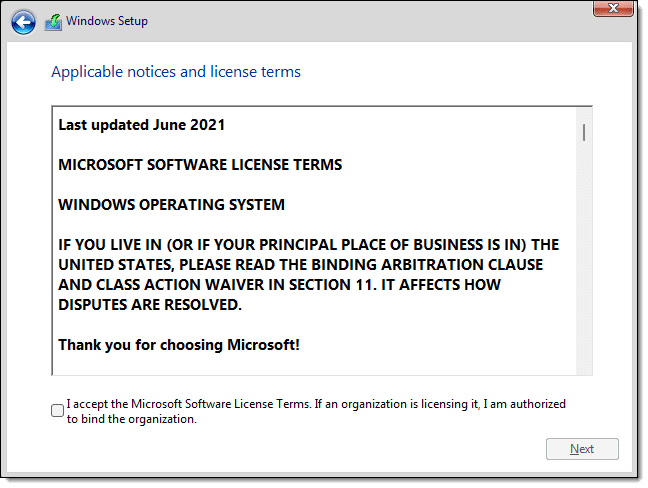
Click the “I accept the license terms” checkbox, and click on Next.
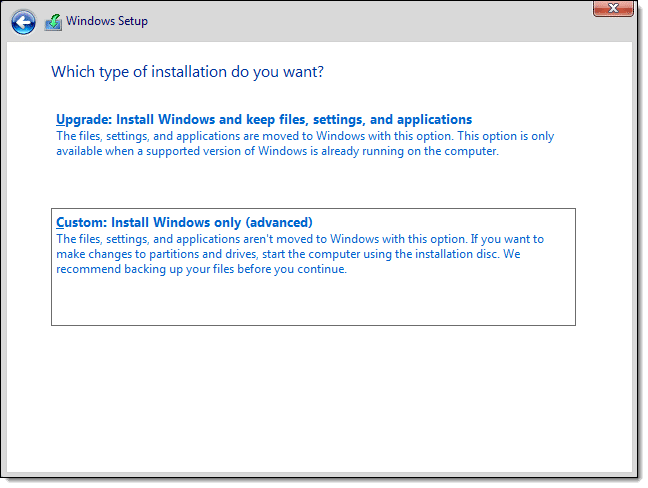
When asked to choose the type of installation to perform, click on Custom.
Disk operations
Windows Setup will ask where you want to put your new installation. This is where the reformatting magic happens.
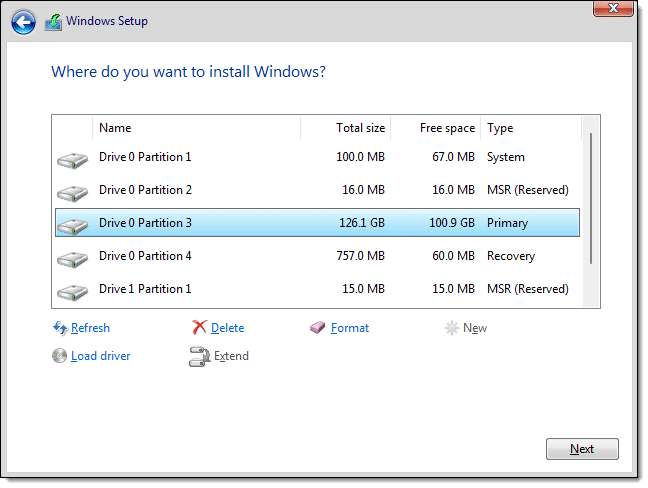
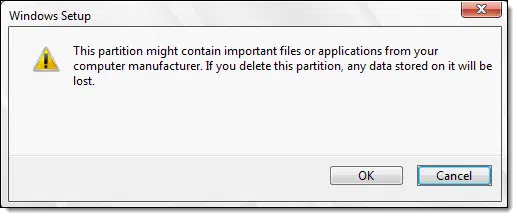
The dialog box lists all existing partitions on the hard disk. In this example, you can see that there are several. To perform a complete reformat of the disk, click on each existing partition on the disk you want to install to (Drive 0 in the example above), and then click on Delete for each. You’ll need to confirm the deletion of each.
After all partitions have been deleted, you should be left with only “Unallocated Space” on the drive you want to install to.
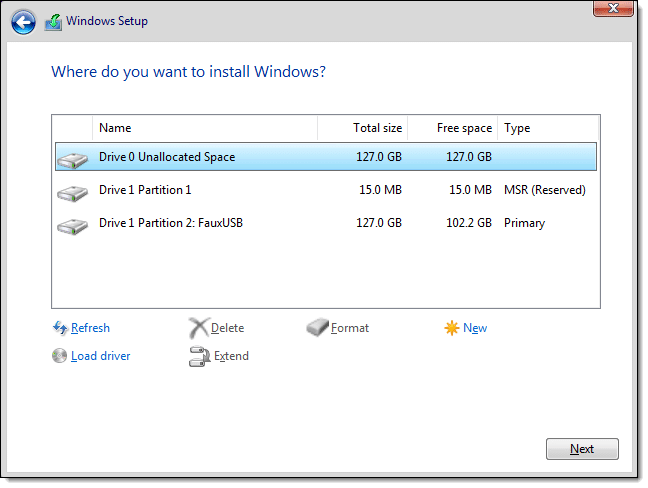
In the example above, there are two physical drives in the system. Drive 0 is the system drive, and the drive on which we want to install Windows. It now has no partitions at all.
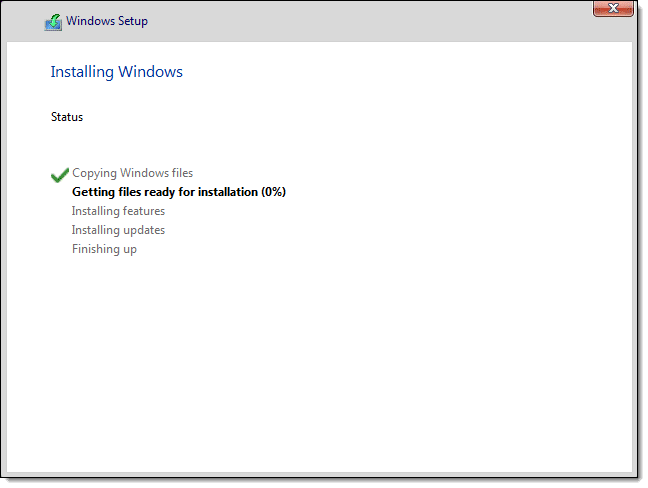
At this point, Windows Setup formats the drive and proceeds to install Windows normally.
Do this
If you need to completely wipe your hard drive, either because you’re reinstalling Windows or in preparation for giving your machine away or disposing of it, this is the easiest way to get it done.
Subscribe to Confident Computing! Less frustration and more confidence, solutions, answers, and tips in your inbox every week.
Podcast audio

Related Video


If you are selling or giving away a computer, it’s a good idea to do a full format or wipe the drive with DBAN. There may still be data in the unused space on the drive.
Instead of me hitting next in the last step I usually hit New and then it tells me that it will create a partition I guess for recovery. So should I be hitting Next or New?
If you’ve removed all partitions Next and New are roughly equivalent. Next probably involves fewer steps.
I’m sure this article will be helpful to some people, but the mechanics of reinstalling Windows is not the problem. The problem and the risk is not being able to activate Windows. There can be many reasons for Windows to decide to banish you. In most instances, and probably ALL instances for home users, there is no product key to type in. Your OEM product key won’t work. None of the “solutions” you’ll find online will help. Any information you find on the Microsoft website will be absolutely useless. You can even have a retail product key and the installation CD, but your key may not be accepted (this from personal experience). You may even go on the Microsoft website and buy a product key, and then be surprised that it doesn’t work (also from personal experience). Thankfully, Microsoft will show you a hex code for the reason why activation doesn’t work. There are many dozens of such hex codes. Each one can have half a dozen more detailed reasons. In any case, none of these reasons will help you. Sorry, but I don’t have any helpful suggestions if this happens to you. Just be aware that it can happen. Of course, this is where Leo will say, use your image backup. Yes, that’ll probably work.
Unless your hardware has changed it shouldn’t be needed at all. The concept is that once you install Windows 10 or 11 it’s “digitally activated” to that particular hardware. Subsequent reinstalls aren’t supposed to require a key, just activation.
Of could “should” doesn’t mean “absolutely always”, but failures should be a more rare occurrence than in the past.
Oh, and yeah, image backups, etc etc etc.
Yeah But when you do a Reinstallation of Windows to wipe clean and you have a Microsoft Account
now you have a new Bit Locker Key! And if you try to restore an old system image it won’t work because that old Bit Locker Key is now erased with a new one!
Just wanted to point that out!
Yes, get rid of bitlocker as soon as possible. It is not for regular people, it is for people with government secrets or stuff like that. It causes no end of inconvenience and grief. Turn it off!
Funny thing, today I was thinking how convenient and transparent it is to use Bitlocker. I don#t have much to hide other than logins to financial institutions and other important accounts. Theoretically, I could manage those with a password manager and cryptomator, but I feel safer knowing that anything sensitive that I forgot to encrypt is taken care of by whole disk encryption.
It’s similar to system image backups in one respect. You can back up your important files, but a system image backs up the files you didn’t realize were important.
I just completed this process on my primary laptop PC, but I do things a bit differently, here, by keeping all my data files stored on OneDrive (offsite), and all my software installers stored on an external 2TB USB drive, I’m ready to recover from nearly any catastrophe, or to simply “Start Fresh”. I have a 128MB USB3 Ventoy drive, on which I keep Windows10, Windows 11, and several GNU/Linux Live image ISO files. The Ventoy software on that drive allows me to boot from any one of those ISO image files, as if they were ‘burnt’ to the disk.
With all that ready to go, I reboot into the UEFI interface, and disable Secure Boot so my System Rescue ISO image can successfully load, then I boot into System Rescue, and run Gparted (an open-source partition management application) to delete all the partitions on the ‘system’ drive. While in Gparted, I set up the correct (GPT) partition table type, then create a new 2GB EFI partition (Windows only sets up a 500MB EFI partition – not enough for multi-booting) at the start of the drive, and a second partition to take up half the remaining space (so Windows won’t use it) at the back of the drive.
Once I have the system drive prepared, I reboot into the UEFI interface to re-enable secure boot, then I boot into the Windows 11 installer to install Windows. Microsoft stores a backup of my Windows configuration, including installed apps, files, etc. in my Microsoft account, so after installation, it’s a simple matter of selecting my laptop from a list of stored configurations to restore most of my system configuration, then I go through all the applications in the ‘all programs’ list to re-install any app that’s not already installed.
With Windows installed and configured, I reboot into the UEFI interface to disable Secure Boot again so I can load SysetmRescure, and use Gparted to remove the big partition I created to stop Windows from taking up the entire system drive, then I create several new partitions in that space for my GNU/Linux distributions (I currently use Solus Linux, and RebornOS), as well as an extra root/system, and home partition for any distribution I want to test on ‘bare metal’.
Finally, I re-enable Secure Boot, then set to installing my GNU/Linux distributions, along with rEFInd (an open source “Boot Manager” I like). I’ve resisted the temptation to go into greater detail here. If you don’t already know how to perform these steps, you should probably get a computer boot (I have “Upgrading and Repairing PCs”) and learn how, before you proceed.
For all intents and purposes, Leo’s procedure accomplishes what I did (with less bother). The reason I went to all this trouble was because I was having issues with my Ventoy boot-disk being able to load with Secure Boot enabled, so I decided to start with a clean slate, then troubleshoot until I found the cause. It was when I got to the step of resetting all the security keys in my UEFI interface (after Windows and GNU/Linux were all installed) that my problem was resolved, so I probably didn’t have to perform a complete fresh start. Knowing this may save me some effort in the future :).
Ernie (Oldster)
I have windows 10. Have been manually backing up the software to a hard drive of my folders. Not the installed apps and programs.
I know at least one program that I use. freeCAD that has problems. Apr. 2024 forum “Infrequent crash when selecting features or faces” Oct 2023 forum “Compatibility issues between V0.20x and V0.21+” etc. Windows 10 end date ~ year off. Should I install Windows 11 in a partition drive? This is suggested by Liron Segev youtube Oct 2021 Using: https://github.com/AveYo/MediaCreationTool.bat and https://www.vmware.com/products/workstation-player/workstation-player-evaluation.html Not this if from pdf with … select for ending to fill in.
Formatting originally meant physically preparing the magnetic surface of a disk so it could store data at all — literally creating the low‑level structures the drive needed to function.
Today, “formatting” means creating a new file system structure — the initial data structures that make previous data inaccessible.
A quick format deletes only the file system structures (the index), not the data.
A full format writes zeros to every sector on the selected partition or disk, similar to a wipe or secure delete, and performs a surface scan to identify bad sectors.
When you install Windows from scratch, there’s no need to format it beforehand; you can instruct Windows to format it during the setup.