Four different ways.
It’s a common instruction: reformat your hard disk.
It’s also something we take for granted. Everyone knows how to reformat a disk, right?
Nope. Let’s not make that assumption.
Let me show you. Here are four different ways to reformat a disk.

Reformatting a disk
Formatting a drive erases everything on it, so be certain that’s what you want.
- Right-click on the disk in Windows File Explorer and click “Format”.
- In the Windows Command Prompt, use the “Format” command with the appropriate drive letter.
- Accept the default File System and Allocation Unit options unless you have specific needs for something different.
A disk is a disk is a ???
Reformatting applies to disks, but not all disks look alike. When I talk about disks, that includes:
- Internal or external disks
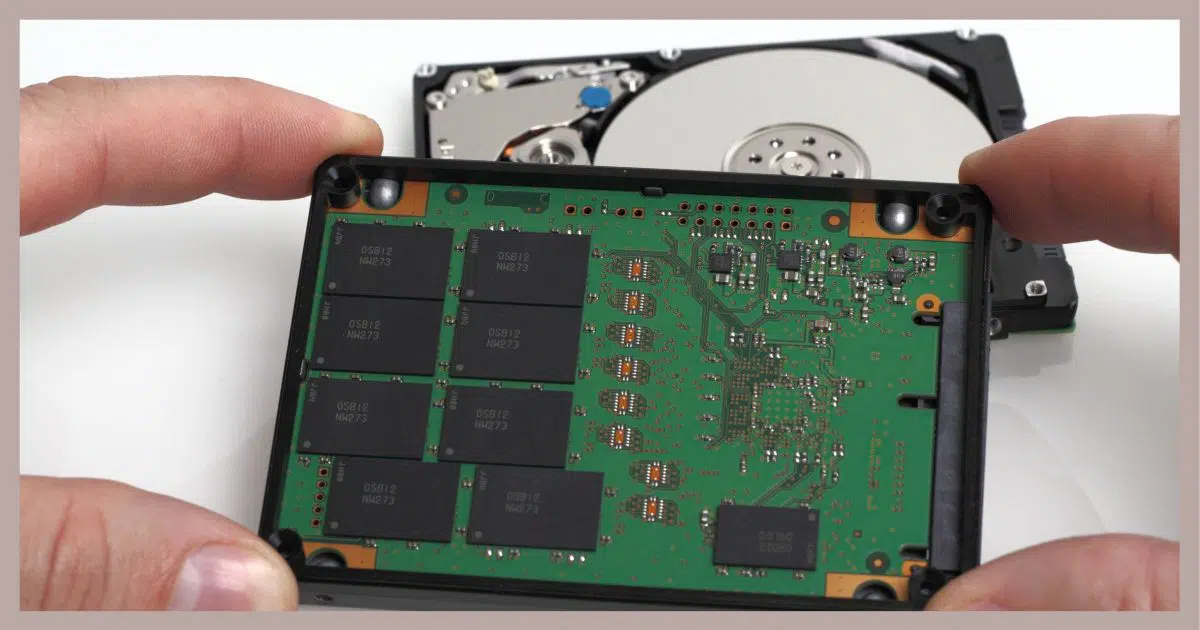
- Traditional hard disks (HDD)
- Solid State Drives (SSD)
- Thumb drives
- Memory cards
Reformatting generally applies to anything that, when attached to or installed in your computer, appears as a disk in Windows File Explorer.
But (there’s always a but), there may be exceptions. For example, if you connect your mobile phone to your computer via a USB cable, it may or may not appear as a disk. Regardless, you don’t want to reformat your phone — or if you do, you’ll want to do it from within the phone’s own interface, not by connecting it to a computer.
Why?
Reformatting is . . .
Reformatting a disk erases everything on it.
Everything.
Sometimes that’s exactly what you want to do, and in fact, reformatting is often the quickest way to do it.
But be sure that’s what you want before you start. Proceed with the assumption that an accidental reformat cannot be undone … because most of the time, it cannot be.
Method 1: Windows File Explorer
Locate the drive you want to format in Windows File Explorer, and right-click on it. A context menu will appear.
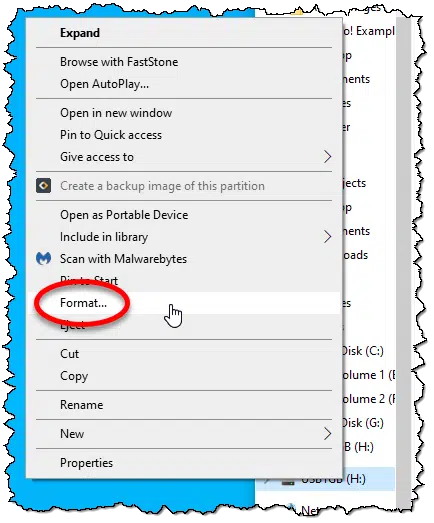
Click on Format… .
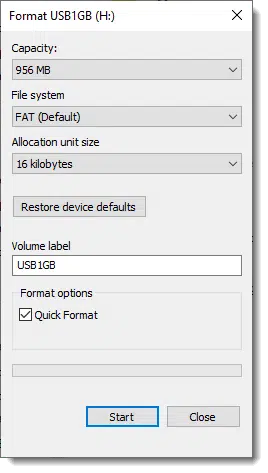
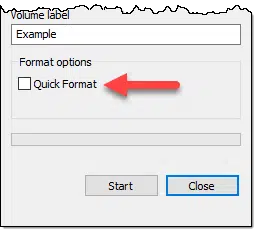
For now, accept all the defaults (I’ll discuss the options later), and click on Start. You’ll first get a warning.
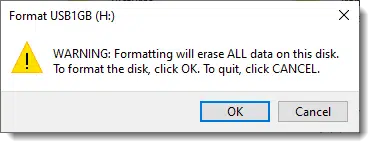
Assuming you have selected the correct disk and are ready to have its contents completely erased, click OK.
The disk will be formatted. How long this takes depends on the size of the disk itself and the speed of the interface connecting the disk to the computer. Since we accepted the default “Quick” format, it should take only a minute or two.
Method 2: Windows File Explorer, Not Quick
Aside from some format-specific housekeeping, a Quick format only erases list of files stored on the disk, and nothing more. The actual file data distributed across the disk is not touched or overwritten. That means in some cases, files can be recovered from a disk that has had a quick format applied.
If that’s something you want to avoid, follow the procedure above, but this time make sure that “Quick Format” is not checked.
Click Start, and after the warning, the format will proceed.
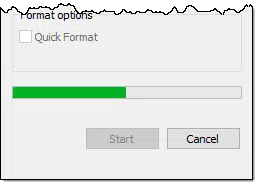
The reason it takes longer is the difference between a quick and a full format. A full format overwrites the entire disk, not just the list of files. Depending on the size of your disk, this can take a long time.
Method 3: The Windows Command Line
You can also format disks using the Windows Command Prompt (or PowerShell) using the “format” command.
First, identify the drive letter assigned to the drive you want to format. In my examples above, I’ve been using a thumb drive that’s drive “H:”. Enter the command “format” followed by the drive, and then Enter. In my case, that means:
Format H:

You’ll note that it asks to insert a new disk. The “Format” command is one of the oldest commands and dates back to MS-DOS and floppy disks, which had to be formatted before they could be used.
Press Enter when you’re ready, and the format proceeds.
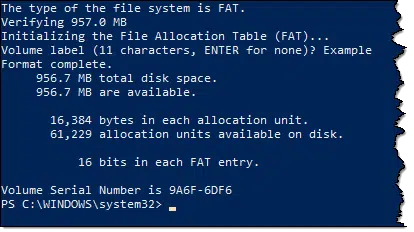
First, you’ll be asked to enter a “Volume label”. This is the name of the disk as it appears in Windows File Explorer. You can leave it blank, if you like, or you can give it a descriptive name. You can always rename it later in Windows File Explorer.
You’ll also notice that the operation took longer. The command-line Format defaults to a full format. It’s exactly like leaving the “Quick Format” box unchecked when using Windows File explorer.
Method 4: The Windows Command Line, Quick
Since a quick format is really all we need for most purposes these days, you can also do that using the command line. Simply add the “/Q” command line option.
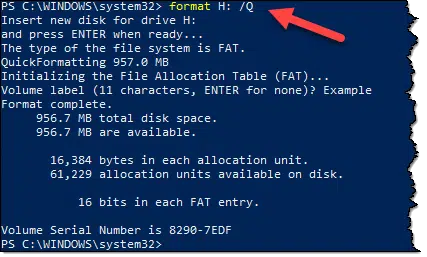
This will skip overwriting the entire disk, and simply empty the list of files stored on the disk.
File systems and Allocation Units
Now let’s return to those options we ignored in our example above. (Let me start by saying you’ll generally be fine to ignore this section and just use the defaults.)
A couple of common questions are what file system should be used and what allocation unit to set. (These options are exposed in the Windows File Explorer interface. If you’re using the command line, type “Format /?” for a list of options including these settings.)
Choosing a file system
The file system is how the files are organized and indexed (and in some cases, protected) when written to the disk. While there are others, the most common you’ll encounter are:
- FAT – “File Allocation Table”, aka FAT32. This is ideal for external disks and other disks that you expect to interchange with other devices, including other computers as well as mobile phones and cameras.
- FAT16 – This is the older version of FAT that dates back to smaller disks like floppy disks. It’s rare that you would want to use this at all, but you might encounter it on existing disks.
- exFAT – This is a newer version of FAT that supports significantly larger disks. It’s generally compatible across a wide variety of devices, but be sure to check with non-Windows devices to make sure they are able to access exFAT formatted disks.
- NTFS – The New Technology File System is a faster and more robust file system that includes many features such as file-level security, journaling (a resiliency feature), and much more. It’s the default format for internal hard disks ever since Windows XP at least. If you’re formatting an internal disk or a disk you expect to exchange only with Windows systems, this is the format to choose.1
Choosing allocation units
Allocation units are the “chunks” in which disk space is allocated.
It’s probably best described by example. If we choose an allocation unit of, say, 1024 bytes, then:
- A 1-byte file will take up one allocation unit, or 1024 bytes on the disk.
- A file anywhere from 2 to 1024 bytes in size will take up a single 1024-byte allocation unit.
- A 1025-byte file will take up two allocation units, or 2048 bytes of space.
Which allocation unit size to select depends mostly on how the disk will be used. If you expect lots and lots of small files, then a smaller allocation unit makes sense. If you expect fewer, larger files, then larger allocation units could work. The reason you might want to consider it would be to maximize disk availability — smaller allocation units imply more overhead information needs to be kept.
In both cases — file system and allocation units — not all options will be available for all disk types.
And when in doubt, it’s perfectly acceptable to accept the default recommendations made by the formatting utility.
Do this
Subscribe to Confident Computing! Less frustration and more confidence, solutions, answers, and tips in your inbox every week.
I'll see you there!
Podcast audio

Related Video


Everything that Leo has outlined is spot on, but several things aren’t mentioned. Where else is the data that you think you are deleting? In the cloud, a backup, a thumbdrive? To get rid of data means everywhere. Secondly hard drives work on a series of concentric data circles with magnetic pulsed recorded and then read. Think of a dotted white line on the road… you can overpaint it, but what about that little bit of overspray to the left and right of the line? There are techniques that use reading the edges of the track to see these tell tales. Two additional methods are rewriting random stuff many times to obscure the “overspray” area (think Hillary and bleachbit software), and finally a strong electromagnet (called de-gaussing) which magnetizes the entire disk, making the whole disk the same bit along with the overspray area
.
My understanding is that unless you have an industrial-sized magnet, degaussing isn’t as effective as you might think.
There is one scenario you didn’t cover, Leo.
Everything you’ve said works perfectly fine as long as the drive ain’t “C:\” .
Of course, if it is, then nothing you just wrote will work at all. 😮
This is a special case calling for an entirely different procedure, which I do believe you cover elsewhere, e.g., https://askleo.com/7947 .
Hi Leo,
I have a 1TB SSD that because I pulled it out too quickly is now Un-usable.
Is there any way that I can reformat it so that it can become usable again?
It is unreadable and unrecognised in File Explorer.
I can see it in Diskpart, but it does take a while for it to be detectable.
In Diskpart I have tried using the Command “Clean” and “Clean All” but it
keeps coming back with I/O Error.
Can you help me please…….
Hi LEO, I am now beginning to understand how your system is working as the new boy to the block; being a wartime baby; adds to my difficulties in grasping an understanding of the I.T., but as everything is now run by this technology; will have to learn to use it; as it is the future.
As I have now had a breakthrough with my studies, after so much energy, it’s not surprising how so many people, men and women, can not break through the knowledge barriers and perhaps throw the towel in. too early.; in the game; but with my background in teaching, you can always find a way forward. Your studies on your site have opened a door in my mind to help me to overcome my struggles, as before, I was in the dark, and it’s so easy to give up. the battle. thanks again for all the support you have given over the years to help others like me. Anthony.
Hi Leo,
As a new subscriber, I really appreciate all the tips and knowledge you share. Although I have not viewed and read more than a very small fraction of what you’ve published, there’s one significant point I haven’t seen clarified.
A few sources make a clear distinction between full formatting of HDDs and SSDs, not recommending full formatting of SSDs. Crucial (Micron Technology) explains, “If you’re used to formatting a hard disk drive (HDD) you’ll notice that formatting an SSD is slightly different. SSDs use different technology than an HDD, so the formatting function is a different process for each.
That’s why it is important to make sure that the box marked Quick Format is checked before formatting an SSD. If unchecked, your computer will carry out a Full Format, which is safe for HDDs but would cause your computer to perform a full read/write cycle, which can shorten the life [of] an SSD.”
Could you recommend some specific software (e.g., WD Drive Utilities) for a thorough and safe analysis of an SSD, and erasure of data?
Thanks!
The helpful info included in https://askleo.com/chkdsk_what_is_it_and_how_do_i_run_it/ answered most of my questions. My only remaining curiosity is regarding the complete erasure of data.