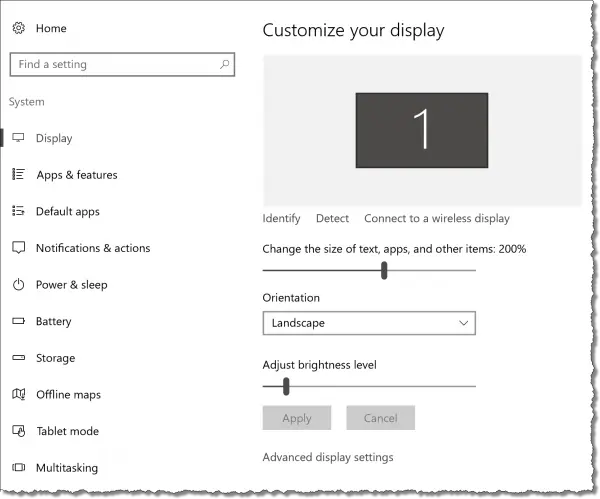
Windows now lets you easily control the size of things on your display.
I’m sure this in part a response to the incredible density of pixels on newer display devices (my new laptop has a 3840 × 2160 pixel display!), and partly in response to individuals who simply want things to appear bigger.
Rather than looking deep into display settings for some obscure DPI setting, the ability to adjust the size of what’s on your screen is now a simple slider included on one of the first display setting panels you find.
Right-click on an empty area of the desktop and click on Display settings. On the resulting page, you’ll find a setting titled “Change the size of text, apps and other items” with a percentage. You can adjust that percentage by simply moving the slider to the right or left. 100% means that the a 10-pixel-wide image or character will take up 10 pixels. Changing that to 200% will make it appear twice as big.
I use it all the time. That 3840 × 2160 laptop is great, except when I’m recording a video, when I change the resolution to standard HD (1920 × 1080). Whenever I change the resolution, though, I find I have to change this percentage to make things on the screen a more sensible size.
Play with it. Set it to a comfortable percentage for you. You’ll find that almost everything on the screen will be affected by this setting.


