It’s there; might as well use it.

Well, in a sense, it is just sitting there, waiting to be used. (Why does it exist? Good question. I just know that it exists often enough to warrant addressing.) The problem is it’s waiting for you to tell the system how it should be used.
Fortunately, this is pretty simple. More often than not it doesn’t require any additional tools; basic partition management and rearrangement are built right in.

Unallocated space
If your hard disk has unallocated space, you can use the Windows built-in disk management tool to either create a new partition with its own drive letter or, if the unused space follows another partition you use, you can extend that partition to make use of the space.
Unallocated
Run Disk Manager by right-clicking on the Start menu and clicking on Disk Management. You should see something similar to this.

That thick blue line represents a single physical hard disk that is divided into several partitions. In the example above, those are:
- Healthy (Recovery Partition) – This is typically a partition that has a bare-bones copy of Windows, recovery tools, and possibly a copy of Windows to be used for reinstallation and repair.
- Healthy (EFI System) – This partition is related to the UEFI BIOS and is used at boot time.
- Healthy (Basic Data Partition) – This partition, which also includes a drive letter in its description, contains that data drive you see within Windows. If you have only one internal disk, you’ll see at least one partition for the “C:” drive containing your system.
- Unallocated – This is the partition in question. That unallocated partition represents disk space that will not be used until you allocate it.
There are typically two approaches: create a new drive or extend an already existing one.
Format it as an additional drive
A very common approach is to create a new drive out of the unallocated space. It’s conceptually simple: just make the unallocated partition visible.
Right-click on that unallocated drive and click New Simple Volume…
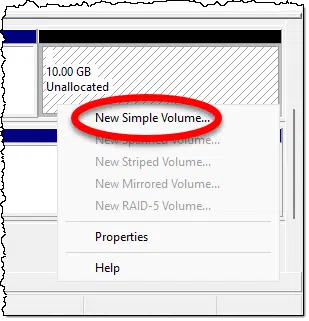
This starts the New Simple Volume Wizard. Click Next on the resulting dialog to be taken to the page where you specify the volume size.
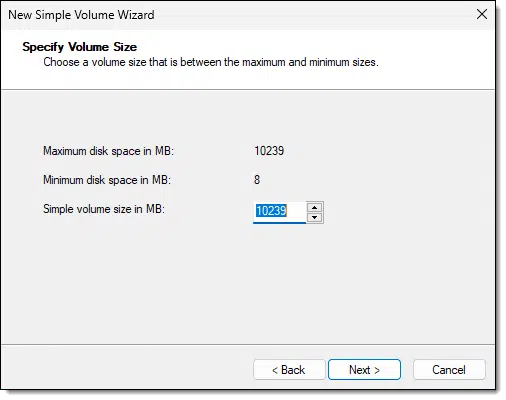
The default answer is to use all of the available space, which is probably what you want. If you want to break the unallocated space into multiple drives, you might choose a smaller size.
Click Next and you’ll choose the drive letter to be assigned to the new partition.
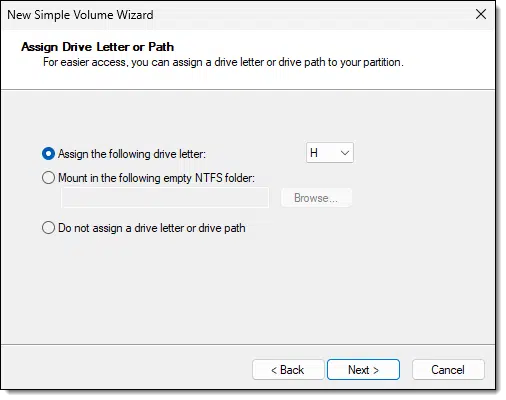
Once again, the default is probably appropriate unless you have a specific reason to change it.
Click Next, and you’ll specify formatting options.
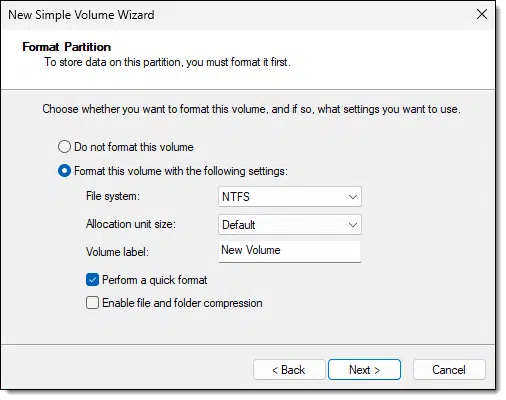
The answers to the default are typically appropriate, although this is a good time to specify the Volume label of your choosing. It’ll appear as the name of the drive in Windows File Explorer and elsewhere.
Click Next to get a summary screen for confirmation.
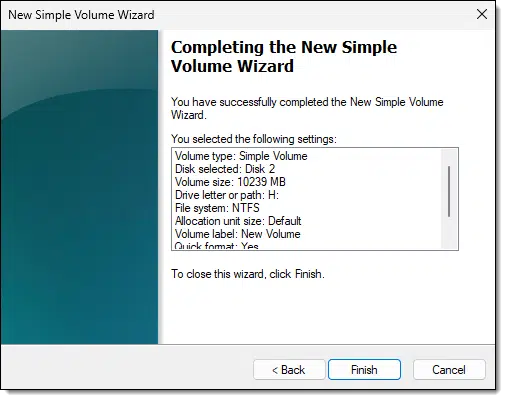
Click Finish to complete the operation.
Windows then formats the drive. When complete, it appears as “just another drive” on your system.

You can begin using the new drive immediately.
Expand the adjacent drive
The other approach (which in previous versions of Windows required third-party tools) is to expand an adjacent volume to use the unallocated space. This is likely the most useful, as it simply adds the unallocated space to the drive physically preceding it. No new drives are created.
Right-click the immediately preceding partition and click Extend Volume…
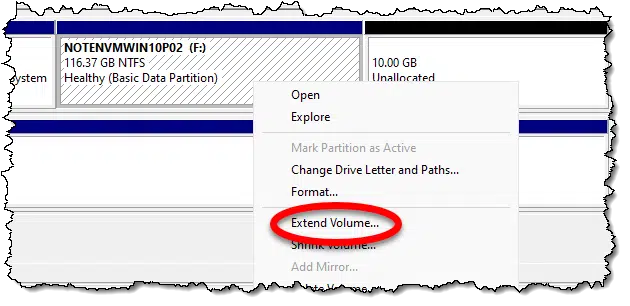
That option should only be available if there’s room to expand — meaning that there’s unallocated space following the partition.
This time, we’ll start the Extend Volume Wizard. Clicking Next takes you to the Select Disks dialog.
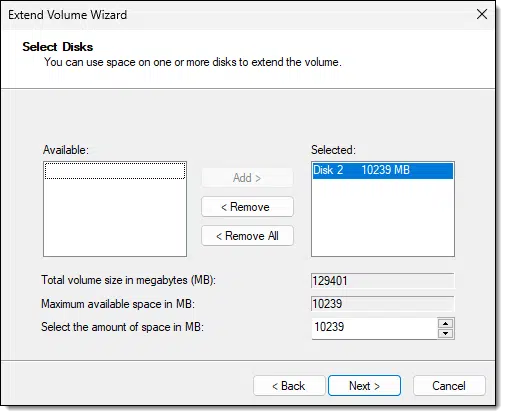
This somewhat confusing step is all about selecting which partitions on the disk are to be added to the volume that we’re extending. The good news is that in this simple and common case — an unallocated partition immediately following the C: drive — the dialog is pre-loaded with default choices that are probably what you want: extend into the entire unallocated partition.
So all we need to do is click Next.
A summary screen confirming our choices appears. Click Finish, and Windows begins the operation.
When complete, the unallocated partition is gone, and the F: partition is larger.

Non-adjacent partitions
There is one scenario where the Disk Management tool within Windows won’t be able to help: when the unused space isn’t immediately following the partition you want to make larger.
Third-party tools are called for in this situation. There are several that can re-arrange the partitions on your disk however you’d like.
But for this simple case, none are needed.
Do this
If you’ve got unused space on your hard disk — which can happen for a variety of reasons — why not use it? You can either make it an additional drive or add it to an existing drive.
Here’s something else worth doing: subscribe to Confident Computing! Less frustration and more confidence, solutions, answers, and tips in your inbox every week.
Podcast audio

Related Video


You mention third party tools for combining non-contiguous partitions. I’ve been using EaseUS Partition Master for years. It’s a paid program but for most people the free version is perfect.
I tried the free version of Easeus Partition Master, but it wouldn’t make the changes permanent unless I bought the paid version.
Accroding to the comparison page for the different versions of Easus Partition Master, there’s nothing about it not saving changes. Are you using the free version or the free trial version?
Choosing the right EaseUS Partition Master
Thanks for the response. I have the Free version of EaseUS Partition Master. When I go to ‘Apply Changes’ after dragging the 1st partition to extend into the unallocated space, I get the message:
“The free version does not support adjusting the MBR partition larger than 2 TB. Upgrade to Pro Version to continue.” So, I didn’t know that limitation of size to MBR and converted to GPT which worked. But when I then tried to extend the partition (this is a 4TB USB HD) it takes me to a purchasing screen. Anyway, I was able to extend the partition and create a single partition of the full capacity using Windows Disk Manager. One puzzling thing about this whole scenario for me is that originally I had this drive with a single partition as it came from the factory (Seagate) and do not know why it became 2 partitions without my input. It was reporting a capacity of only 128MB with the rest unallocated in a second partition and inaccessible. It had backup data on it but none of the files were showing up in File Explorer; fortunately, I was able to recover the data I wanted using a free program called R-Photo, fortunately. This was all before the re-partitioning of the drive. Thanks for listening!
When I got a new computer a couple of months ago, I saw that it had two partitions. I opened Disk Management to combine them as I always do when I get a partitioned computer. When I opened Disk Management, it appears as if there were two physical drives.
It seems strange that the data partition D: drive is listed as Disk 0, which I’ve always seen previously as the system disk. In this case, Disk 0 is the data partition and Disk 1 is the system disk. And there’s an E: drive listed that is the size of the combined system and data drives. When I click on the E: drive in File Explorer, nothing happens. This leads me to believe the E: drive is the only drive and the Disk 0 and Disk 1 are partitions that are somehow shown as 2 physical drives. EaseUS Partition Master lisyt it as “Disk 2 (Msft Virtual Disk Virtual DIsk Bus 1 TB Basic MBR)”