Step by step.

The “black square”, as you call it, is more properly referred to as a QR Code. QR stands for Quick Response. And while we won’t take a picture of it, we will use it to set up Google-authenticator-compatible two-factor authentication.
Let’s walk through those steps.

Setting up two-factor authentication
To set up two-factor authentication (2FA) using Google Authenticator, scan the QR code displayed during setup with the camera app on your phone. If scanning isn’t possible, enter the provided setup key by hand. Save the QR code or key securely in case you lose your phone so you can set up its replacement without hassle.
Two-factor authentication
Two factor authentication, or 2FA, adds a second step to the login process the first time you sign in to a different machine or browser. You’ll enter your username and password, as usual, but then be asked to prove you’re in possession of your two-factor device, typically by entering some kind of code sent to or displayed on it. This prevents hackers from signing into your account even if they know your password because a) every sign in for them is “a different machine or browser” from what you’ve signed into already, and b) they won’t have your second factor.
“Google Authenticator compatible” is a form of 2FA that uses an app installed on your smartphone to provide that code. It’s “Google Authenticator compatible” because there are many different apps that are compatible with this technique, Google Authenticator was just one of the earliest and most popular.
Once set up, you’ll just grab your smartphone to provide the code as needed.
Prerequisites
In order to set up this type of two-factor authentication, you’ll need the following:
- A smartphone with a camera
- The Google Authenticator (or a compatible app) installed on that smartphone
- An account that supports “Google authenticator compatible” authentication
Our example here, of course, is a Google account, so the last item is a given. The process with accounts from any other provider that supports this type of two-factor authentication is similar.
Help keep it going by becoming a Patron.
The process
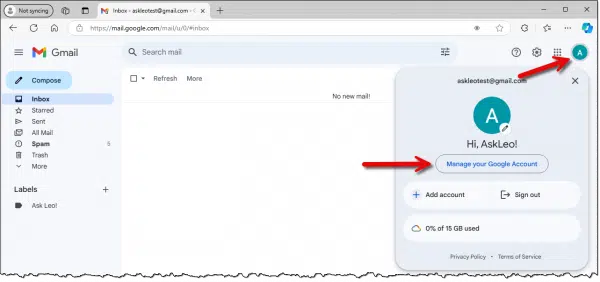
Sign in to your Google account. I’ve signed into Gmail. Click on your profile icon in the upper right and then on Manage your Google Account.
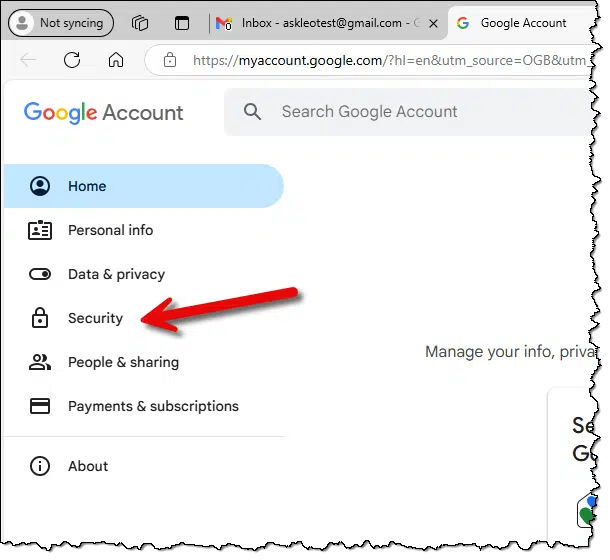
On the next page, click on Security in the left-hand column.
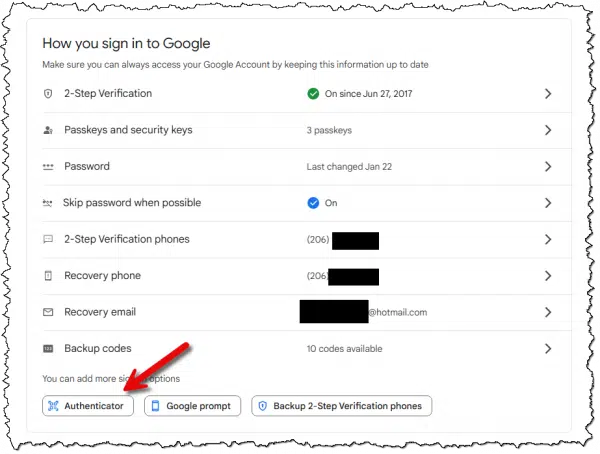
Scroll down to the “How you sign in to Google” section and click on Authenticator.
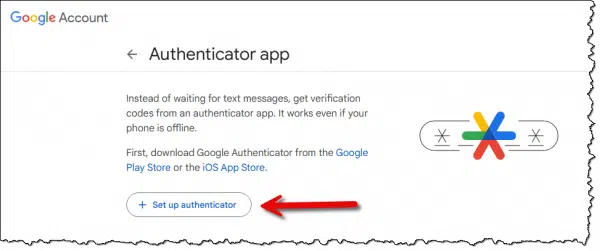
You’ll then be asked to sign in again for security, after which you’ll be shown the “Authenticator app” page. Click on Set up authenticator.
Next, you’ll be shown a QR Code.
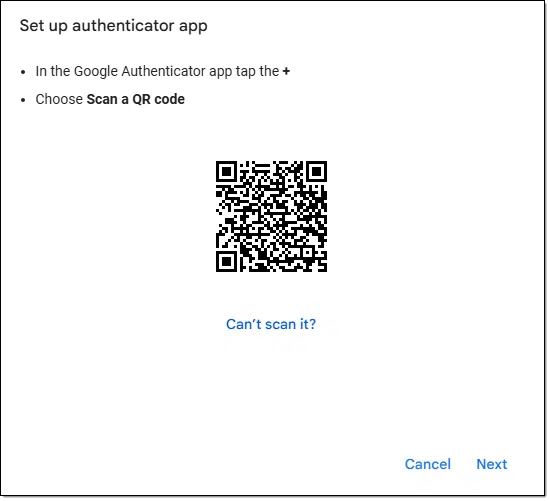
You may want to take a screenshot of this QR code. More on that below.
Now you reach for your smartphone.
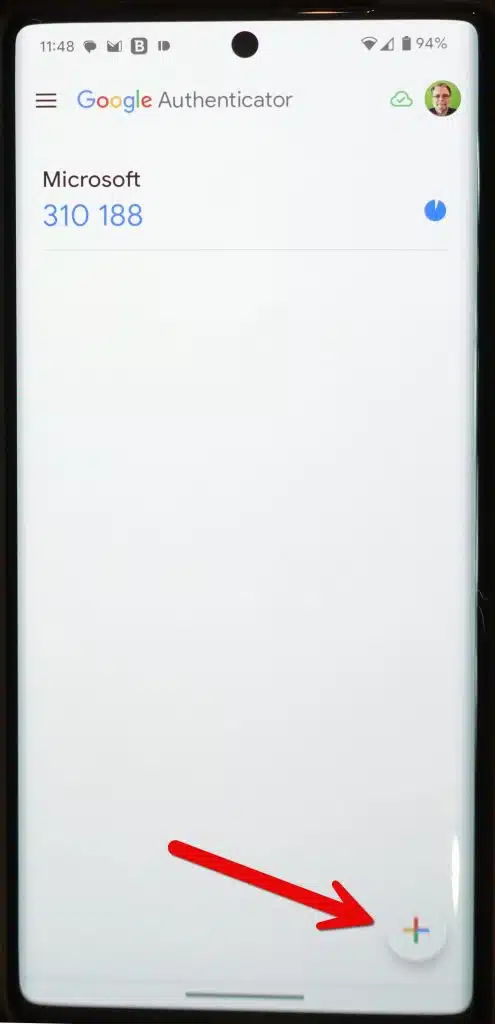
Open the Google Authenticator app. Click the “+” at the bottom right.1 (In this example, I already have an existing account present in the authenticator. It can handle as many different accounts as you need.)
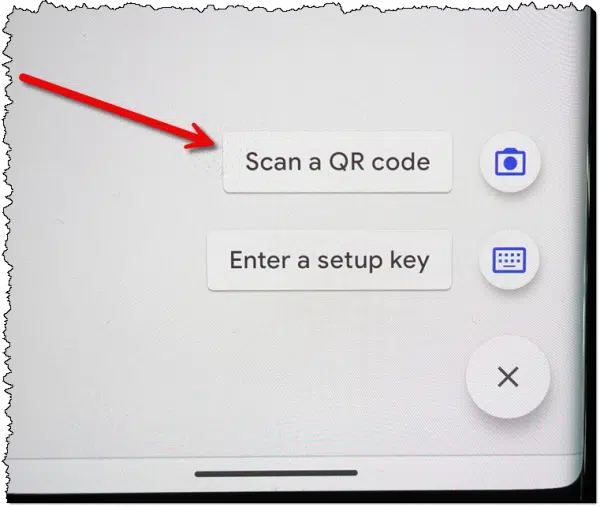
On the next screen, click on Scan a QR code.
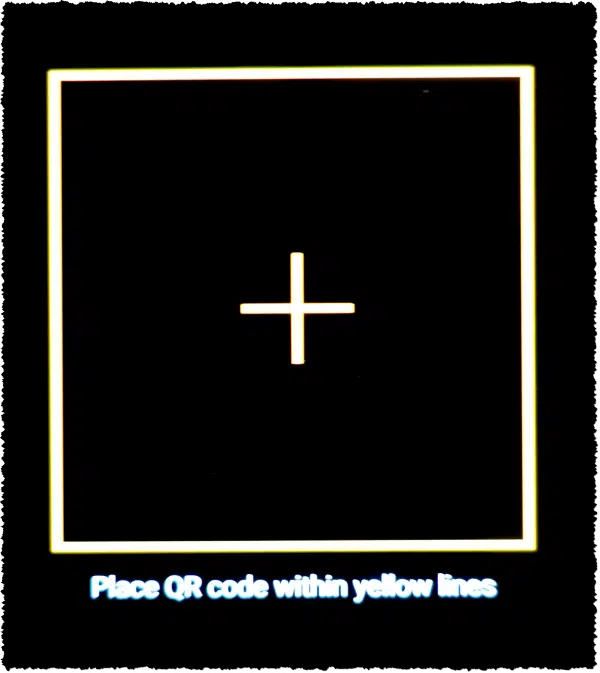
The authenticator app will turn on the camera and present a rectangle on the screen. Point the camera at the QR code on your computer screen.
As soon as the app recognizes and decodes the QR code, it will immediately return to the initial screen and display the newly added authentication code.
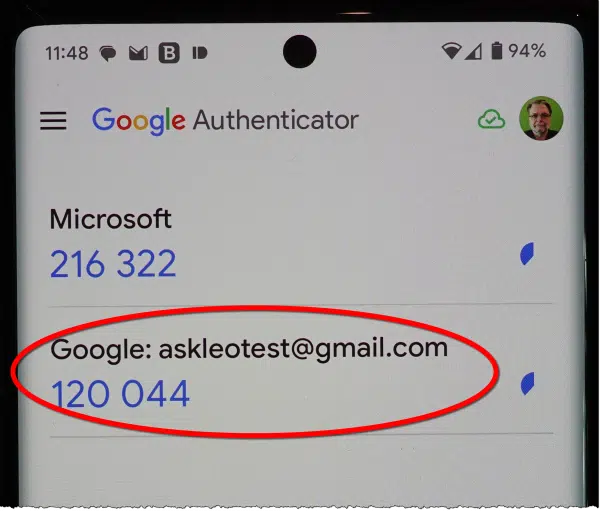
This code will change every 30 seconds. (The pie-like icon on the right is a time-remaining indication.)
Return to your computer and click on Next beneath the displayed QR code. You’ll be prompted to enter the currently displayed two-factor code from your mobile device. Enter the currently displayed code and click on Verify.
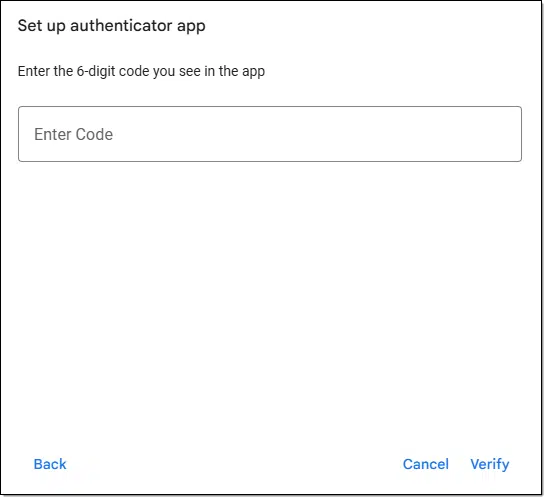
This confirms the authenticator on your phone is properly set up and synchronized with the account.
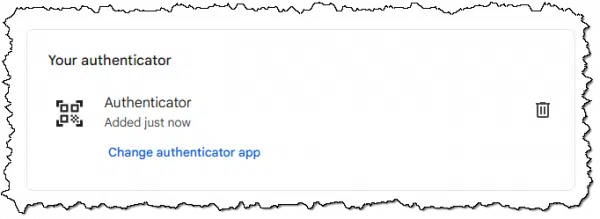
You’ve set up Google Authenticator two-factor authentication for your Google account.
No camera? No problem
It’s rare to have a smartphone without a camera, but if you do, or if your camera isn’t working, there’s an alternative approach.
Below the QR code you saw above was a link: Can’t scan it? Click on that and you’ll be shown instructions and a secret key.
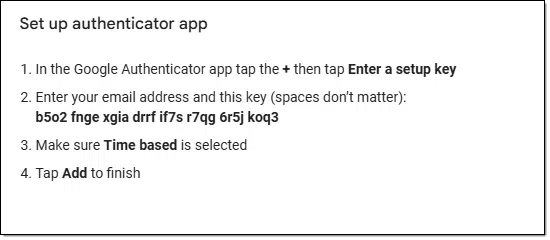
When you went to add an entry to the mobile app, below “Scan a QR code” was Enter a setup key. You would tap that instead, and, following the instructions above, enter your email address and the key displayed. In this example, the key you would type in is:
b502 fnge xgia drrf if7s r7qg 6r5j koq3
You can see why scanning the QR code (which contains this same information) is easier. But if you can’t for some reason, you can use this approach.
Prepping for phone loss
A common concern is: if you need your phone to sign in, what happens if you lose your phone?
There are several approaches, but the most basic is to save the QR code or authenticator key at setup time.
This means:
- When the QR code is displayed, take a screenshot of it before you proceed.
- Click Can’t scan it? and save a copy of the displayed key.
I do both.
If your phone is lost, you’d replace it and then set up the Google Authenticator app again, this time using the saved code. The result will be that the replacement authenticator will display the same codes as the original. (You can also use this technique to set up more than one device.)
Important: these codes are sensitive information. Anyone with access to these codes could set up two-factor authentication for your account. Make certain to save them securely. I like to put them in the “notes” field of my password vault, but any other secure approach is fine. Just make sure it’s not accessible to those who should not have access.
Do this
Use two-factor authentication. It’s one of the best ways to secure your account against hacking. Using the process above, you can now do so using Google-Authenticator-compatible 2FA.
I talk about account security often. Subscribe to Confident Computing! Less frustration and more confidence, solutions, answers, and tips in your inbox every week.
Podcast audio
Footnotes & References
1: I apologize for the quality of these screenshots. Android security prevents direct screenshots of some sensitive apps, so I was reduced to taking photos of my screen.


Can one use Microsoft Authenticator with Google or are we going to have a different Authenticator App for every organization that wants us to use the system?
If it supports the QR-code style of 2FA, it’ll work with any service that uses that.
I faced an issue when I traveled through different time zones with Google Authenticator.
It seemed that the codes did not match what the display. I could not find any information that showed where that “discrepancy” could be adjusted.