Back up files locally as they change.
Regularly backing up the files you care about is a common (if incomplete) approach to backing up. An image backup is the best solution; choosing to back up only the files you work on is quite a minimal backup method.
On the other hand, regularly backing up the files you’re working on, in addition to perhaps less-frequent image backups, represents a more robust backup strategy.
As it turns out, Windows includes such a feature, and it’s called File History.
I’ve discussed Windows’ built-in image backup software in prior articles. Let’s build that more robust backup strategy by enabling File History.

Windows 11 File History
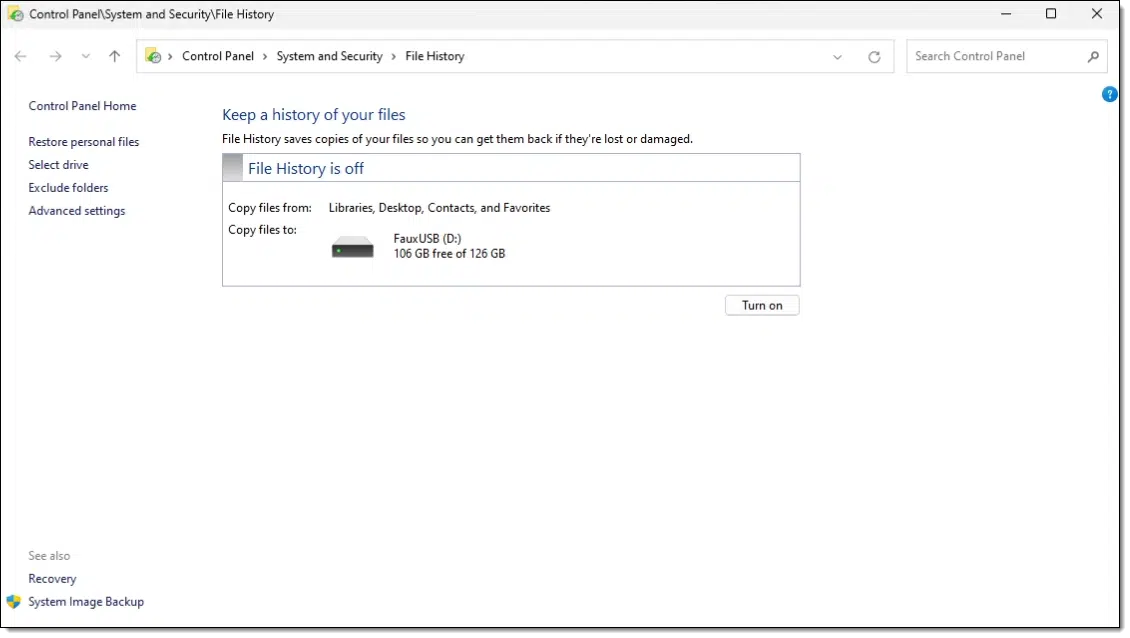
Use File History in Control Panel to turn on the feature and begin backing up files to an external disk as they change. There are additional settings available, but turning it on and selecting an external hard disk to use is really all you need.
What File History does
In concept, File History is a simple feature. Every so often, it looks for files that have changed since the last time it looked and makes a backup copy of any that have.
Those copies are saved to a drive you specify — typically an external drive. In fact, it’s common to use the same external drive for image backups as well as File History.
You can configure File History to remove older backup copies to make room for new ones. The more room you have, the longer backup copies can be kept.
Help keep it going by becoming a Patron.
What File History doesn’t do
File History is not a replacement for an image backup because it doesn’t back up every file on your machine. It only monitors the contents of specific folders for changes. For example, your “Documents” folder would generally be backed up by File History, but Windows itself, as well as other programs you’ve installed and configured, are not.
This is why I consider File History a useful addition to, but not a replacement for, a periodic image backup.
You might take regularly scheduled image backups once a night or once a week, augmented by File History looking for data files that have changed every 10 minutes. Together they provide a significant level of protection.
Help keep it going by becoming a Patron.
Enabling File History
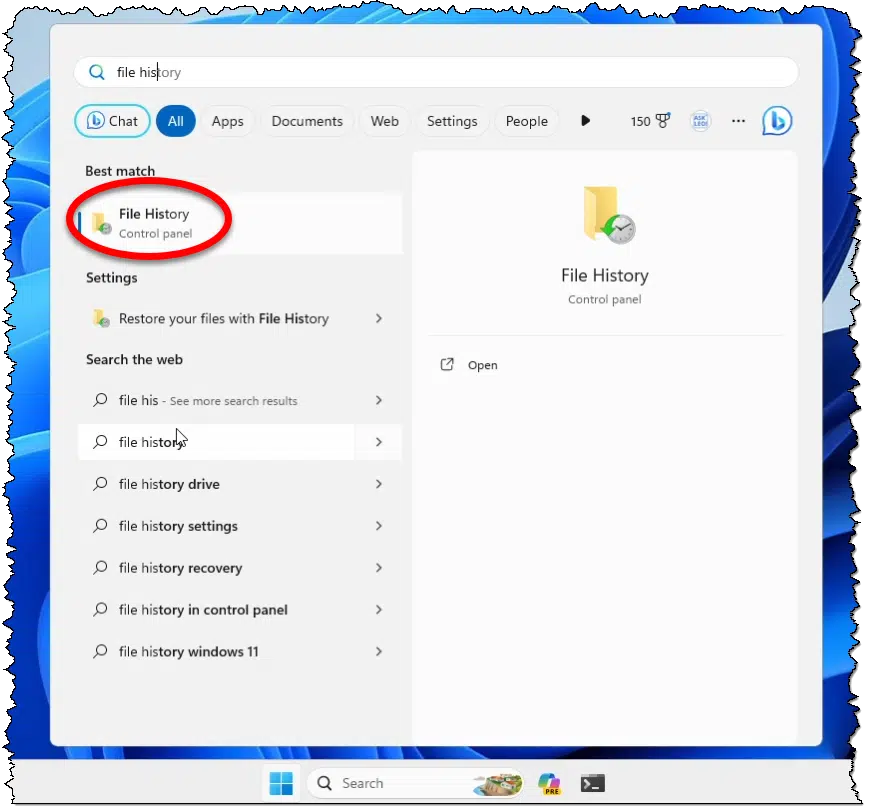
Click on the Start button and start typing File History. Click on File History Control Panel when it appears in the search results.
This will take you to the File History page in Control Panel1, as shown at the top of this page.
If you have more than one external drive attached to your machine, you’ll need to select which drive you want to use for File History. It can be a drive dedicated to this feature, a drive shared with your image backups, or a drive used for other things. The amount of space available on that drive dictates how long File History can be kept.
Click on the Turn On button to turn the feature on.
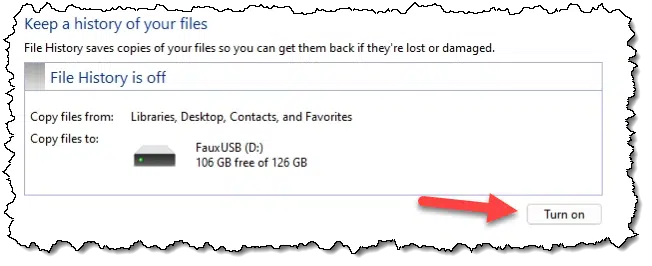
File History is now running.
Configuring File History
Click on Advanced Settings on the left. The resulting page has a couple of items of interest.
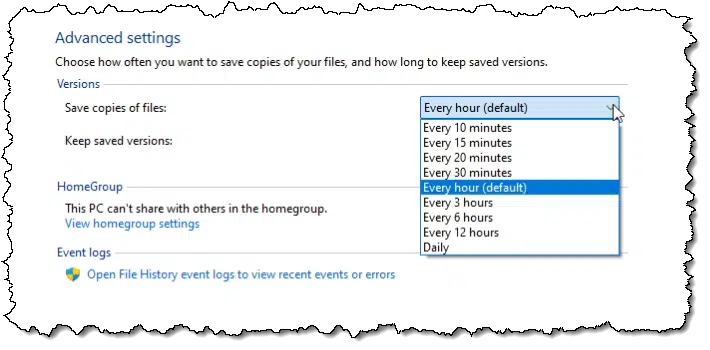
The first setting, “Save copies of files”, controls how frequently File History polls your files for changes. It defaults to every hour, but you can make it as frequent as every 10 minutes or as infrequent as once a day. This affects the amount of space File History uses. For example, if a file changes every 10 minutes, you’ll be backing up six copies of that file every hour. That could add up. On the other hand, having those snapshots available could be helpful if you need to return to recent work.
Speaking of space…
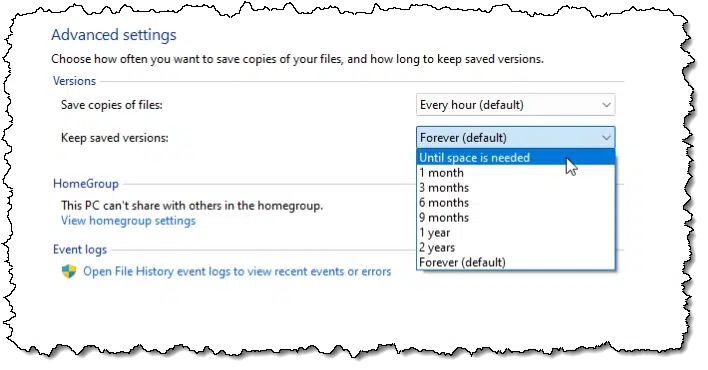
The “Keep saved versions” option lets you control how long backup copies are kept by File History. I tend to prefer the “Until space is needed” option, which uses all the space it can and then starts deleting older backups to make room for newer ones.
What File History backs up
It’s become very opaque in Windows 11, but I believe that File History only backs up the files in your user directory. Typically, that includes the Documents, Pictures, Videos, and related folders that are part of your specific Windows account. Files outside of this — folders you’ve created elsewhere or files belonging to other user accounts — are not included.
There is an “Exclude Folders” option that allows you to specify folders that should not be included. Perhaps folders with large files that change infrequently, such as a Videos folder, might be a candidate to exclude. This frees up the File History space for the remaining files being backed up.
Do this
Turn on File History to put that additional safety net in place.
Restoring a file from your File History-created backup is covered in this article.
Subscribe to Confident Computing! Less frustration and more confidence, solutions, answers, and tips in your inbox every week.
Podcast audio

Related Video


Footnotes & References
1: This feels like a regression from Windows 10, where File History was part of the Settings app. If I had to guess, that may be a passive attempt to move users to use OneDrive instead.

I can’t speak to Windows 11, but in my Windows 10 setup File History does back up files from my separate data drive. But it won’t back up any file whose full path (directories + filename + extension) exceeds 144 characters (making for a full path of 200 characters on the backup drive once File History adds its own path to the front end and the date and time on the back end). And if a folder contains only files exceeding that path length, File History treats it as empty and won’t even back up the folder.
I used File History for years before accidentally finding out that it was treating hundreds of my files and many of my folders as if they simply didn’t exist–without even telling me.
For users who do not share my penchant for detailed folder structures and descriptive filenames this might not be a problem. But the price of relying upon File History is eternal vigilance to avoid accidentally creating or downloading something that File History will blithely disregard.
[Fun fact (not!): Just to make sure that this limitation is a problem with File History and not my PC, I created a file with a 251-character name (258-character full path, counting drive name and .txt extension) and was able to save it to the root directory on both my internal data drive and my external backup drive. But now I can’t delete it from either place, even from the command line or in safe mode; nor can I shorten the name. And when I open the file from the internal drive (though not from the external drive) it displays as a string of Chinese characters!]