It’s still possible, just well hidden.
Microsoft has been pushing us to use Microsoft accounts to sign in to our Windows computers for some time. In recent versions of Windows 11 setup, it appears as if there’s no choice.
While it may be well hidden and obscure, the choice is still there. And it’s not even that difficult.
I’ll show you how.
Update: July 2024: “Microsoft has been pushing” is an understatement. They’ve blocked the approach previously presented in this article, so this is a different technique that should get you the same results.
Become a Patron of Ask Leo! and go ad-free!

Windows 11 with only a local account
Set up a Windows 11 machine without a Microsoft account by using a command-prompt trick during setup. Then disconnect from the internet, choose “limited setup,” and create a local account. This bypasses the Microsoft account requirement.
Why? Why not?
Why would you want a machine with only local accounts and no Microsoft accounts?
Most of the time, you probably don’t. Using a Microsoft account gets you access to several additional features, of course, but my favorite is that account recovery doesn’t require access to your machine. If you lose the password to your Microsoft account, you can reset it from any machine. Once reset, you can sign in to any PC on which you use that Microsoft account to sign in.
However, not everyone feels that way. Some feel that Microsoft is too intrusive and that using a Microsoft account gives them more access to your activities. Some feel there’s just no reason to tie your machine to an online account of any sort just to use it. Some find local accounts simpler and easier to comprehend.
Either approach is good. (Unless, of course, you’re Microsoft with an agenda to push Microsoft accounts.) If you prefer using only a local account, here’s how to set it up.
The magic incantation
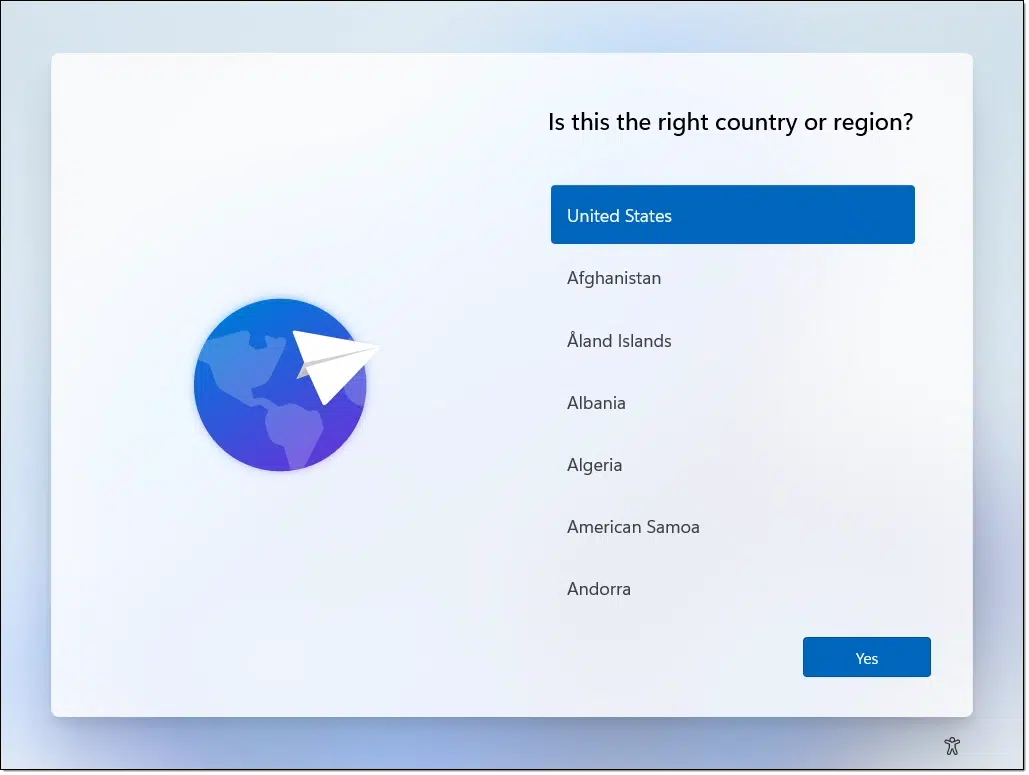
Run Windows Setup (or Reset This PC) normally. At some point, you’ll arrive at the following screen.
Stop.
This is the point at which the “magic” happens.
On the keyboard, type SHIFT+F10. This will open a Command Prompt Window. Into that command prompt, type:
oobe\bypassnro
(with no spaces) followed by the Enter key.
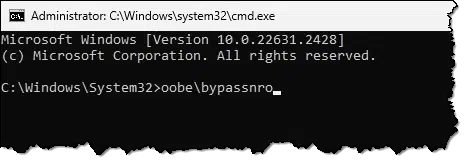
The machine will reboot and return to the same country-selection screen.
Type SHIFT+F10 to open the Command Prompt window again.
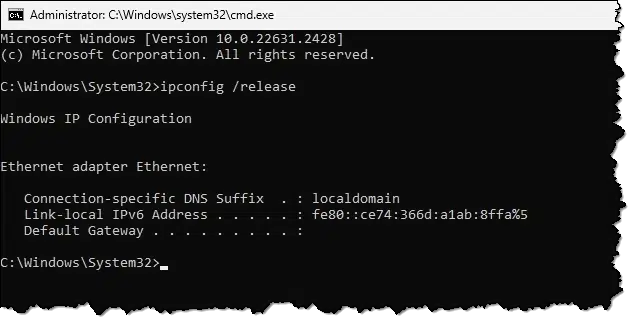
Into that command prompt type:
ipconfig /release
followed by the Enter key.
This will disconnect your machine from the network, including the internet. (Alternatively, you can disconnect the networking cable, but the ipconfig approach will self-repair once we reboot later in the process.)
You can close the Command Prompt window and continue the setup process until you reach this screen.
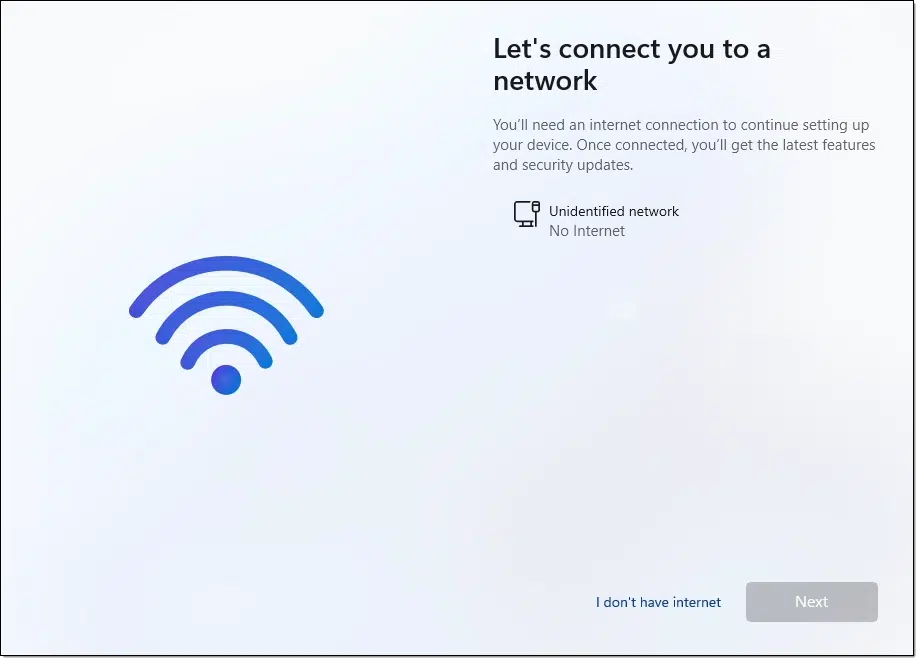
Click on I don’t have internet.
You’ll then be shown a screen that boils down to “Are you sure you don’t want to connect to the internet now?” At the bottom of that screen will be a link to Continue with limited setup. Click that.
You’ll be asked to enter the name of the person using the machine.
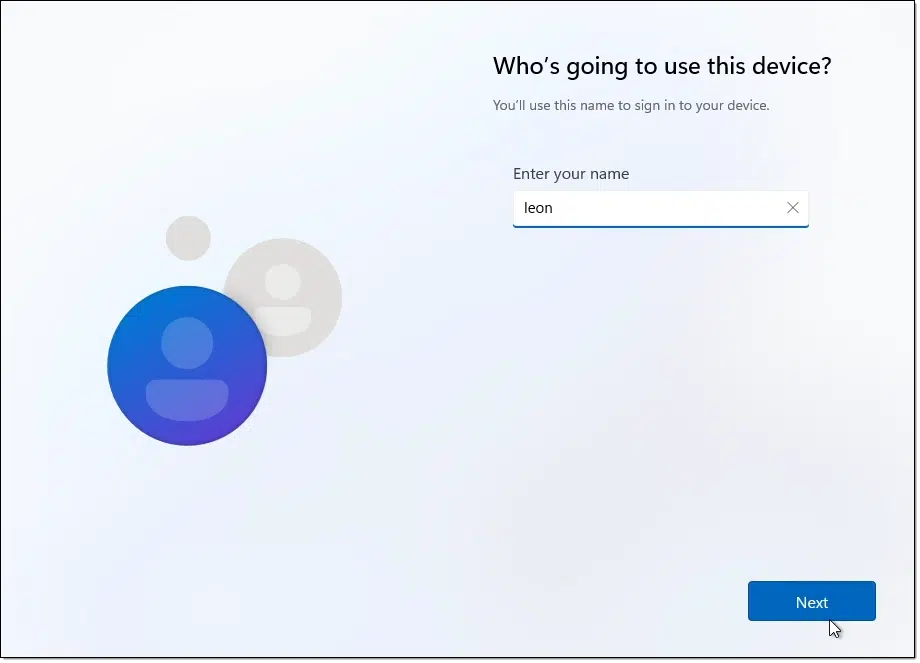
This is your local account’s username. While you can certainly enter your name, I prefer to enter a no-spaces common username I use elsewhere. (This can make some aspects of networking easier later.) In the example above, I’ve chosen my username to be “leon”.
Click Next.
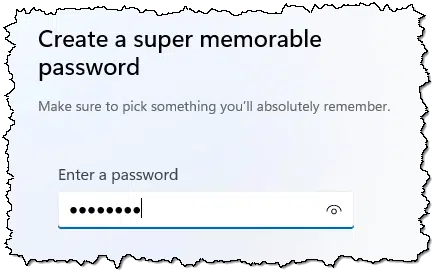
You’ll be asked to create a password for your local account and confirm it by entering it a second time.
You’ll then be required to set up three “secret questions” for account recovery should you ever need it. This is one drawback of a local account: you cannot recover it using any online methods as you can with a Microsoft account. Be sure to choose questions and answers you’ll remember and record them somewhere secure.
Complete Windows 11 setup. You’ll now have a Windows 11 machine using only a local account.
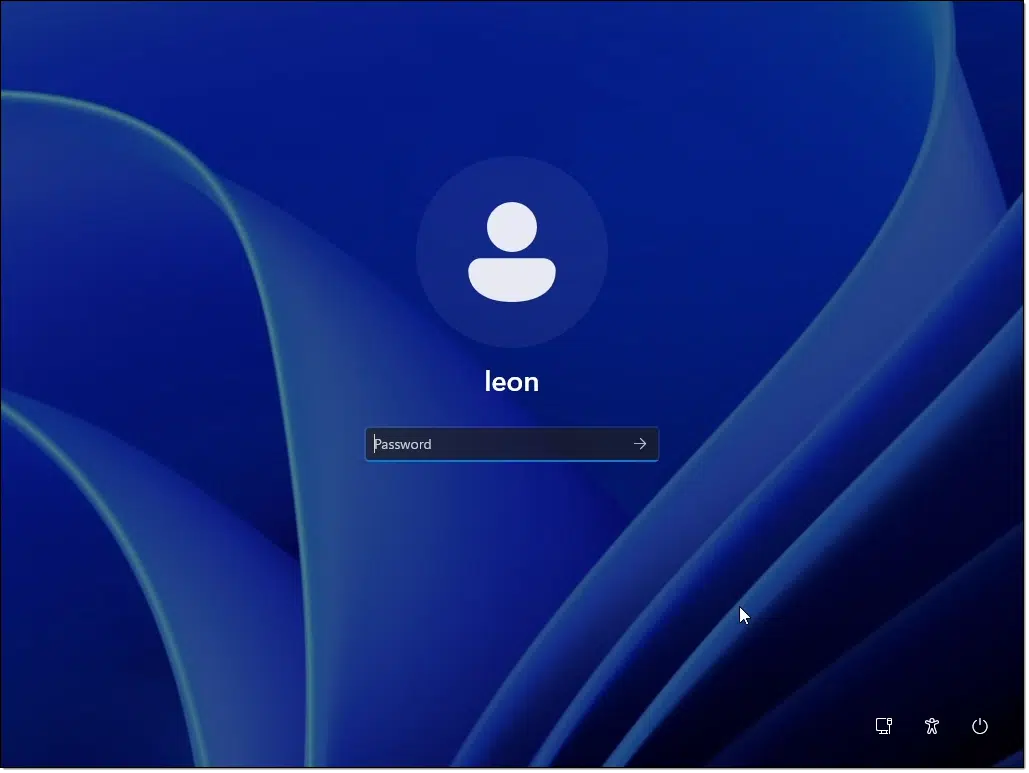
Like any initial account on a fresh setup, it’ll be administrator-capable.
Do this
If I had a recommendation at all, it would be this:
- Set up your machine using a Microsoft account.
- Add a local user account that is also an administrator.
- Use whichever makes the most sense for your day-to-day work, knowing you have the other as backup.
But if you want to set up a machine completely Microsoft-account-free, now you can.
Another recommendation? Subscribe to Confident Computing! Less frustration and more confidence, plus solutions, answers, and tips in your inbox every week.
Podcast audio

Related Video


Theres an easier way to do a local account on Windows 11 Pro Just do setup for Work select Domain Setup then do Local Domain join under options that will force a local Account to be created first. without hammering the email address
This is useful information to know. I set up the church computers with local accounts because multiple users will need to use the machine but they don’t need access to the church’s Microsoft account and everything else that comes with it.
We’re still on Windows 10 and I’ve been able to set up these “Other Users” local accounts with no password to make it easy on those who need to get in and type a letter or browse the internet. Will Windows 11 allow a local account with no password?
This is a new one on me, if it works I imagine Microsoft will soon cotton on and remove the loophole.
I’ve found the easiest way is to just play along with them, make up a new MS account to set up the pc, then immediately switch to a local one and remove the online account completely.
I have a username “RockFox” that I have used since Windows 95. I want to keep it. But Microsoft in their arrogance creates a username using part of your Microsoft email account. UGLY. I have found workarounds thru Windows 10 to keep my preferred username on a clean install. I want to do a clean install of Windows 11 and I was stumped on how to keep my preferred username. Thank you for this tip.
This is the inelegant way to do it! There’s a ‘proper’ way, that’s even easier.
At the Country screen, hit Shift & F10 to get a Command Prompt box.
Enter oobe\bypassnro [no spaces] and the PC will reboot, start again and give you the ‘I don’t have Internet’ option that’s missing on a ‘standard’ install when you get to the ‘Let’s connect you to the Internet’…
Honestly, this alternative feels even more “inelegant”, but whatever works for you.
I use Linux Mint so I don’t have to generally deal with this. but thanks for the info as I do have Win11 Pro setup in a QEMU/KVM virtual machine on Linux (‘activated’ with a certain program with HWID method which the activation is tied to the UUID of the VM it seems given on clean installs it loses the automatic activation until I restore the previous UUID at which point it’s automatically activated with no further action required) as it emulates TPM v2.0 and on my 3rd gen i5 (which is not even a officially supported CPU but it works with official Win11 ISO with no further action needed for it to work) and I dislike online accounts for Windows as a general rule as there is no need if you ask me as we have went without them for ages so no real need to start now as it’s just more stuff tied to you they don’t need to know (which Leo already briefly mentioned).
I generally don’t use Windows, but on that rare occasion/limited use (certain things ill occasionally use it for), it can be nice to have as a backup. but with this forced online account junk, all the more reason I am glad I dumped Windows for Linux Mint 5 years and 1 month ago now. there is a bit of a adjustment period when I changed, but after a while it feels normal as things tend to be snappier on Linux as Windows seems to load a lot of junk after boot up etc. but I realize this might not be a option for many people, especially if they have certain software that does not work on Linux through Wine etc.
but that ‘no at thankyou’ stuff seems like a quicker way to do it as I was aware of what Julian Hicks said above as I think I did that when I setup Win11 on my VM a while ago but I had to disconnect internet from the VM temporarily for it to work if I recall correctly (like after the reboot from the ‘oobe etc’ stuff). but I might play around with Win11 in another VM just to see if I can get what John said working and Leo. but I can see why Leo mentioned his method since it seems a bit more straight forward than other methods people use.
If you set up a PC with only a local account, will you then get on-screen pop-ups or other “reminders” to set up a Microsoft account on the machine?
Yes.
Small update: I was just playing with a fresh Win11 virtual machine on Linux through QEMU/KVM etc (which I talked about in my previous post) and this time I used Leo’s method and it worked exactly as shown. nice and easy as I am definitely sticking with this method as I can’t see something being quicker/easier than this.
also, I heard the next version of Win11, which is 24H2, will apparently require the SSE4.2 CPU instruction to function as without that it appears Win11 won’t boot/function outright. but good news is the odds are your unsupported CPU will work as my i5-3550 is from the year 2012 and it has the SSE4.2 CPU instruction and I am pretty sure Intel CPU’s a fair amount older than mine still have that and I heard on the AMD side it goes back even further.
Just an FYI on the three security questions: the answers to all three questions can be the same. Better yet (worse yet?) the answer can be a single character.
Great focus on security from Microsoft.
That they’re using questions at all is … questionable.
(And yes, I’ve blown through them with the same two-letter “answer” for each as well.)
In mid-August 2024 I received a new laptop with Windows 11 Pro version 23H2 on it.
I used the old method and it worked!
When asked for Microsoft account info,. I entered a bogus e-mail address and password (tried to leave it blank but it would not accept blanks).
After getting to the desktop I did the following:
Search for “Settings”
Click on “Accounts”
Scroll down on right side looking “Other Users”
Click on “Add Account”
Click on “I don’t have this person’s sign-in information”
Click on “Add a user without a Microsoft account”
Who’s going to use this PC? (hidden)
“Make it secure”: Enter password: (hidden)
Security questions: 1. 2. 3.
Click on “Change account type”: Administrator (default: Standard User)
(click on the small downward pointing arrow next to Standard User)
Thats it!
I now have a computer with a local account!
I do notice that when I click on the lock(?) screen) in the bottom left corner I have 2 accounts showing (guessing on is the Microsoft account and the other is my local account.
And when I click on the lock(?) screen it’s asking for my local account password.
Can the local account be set up with no password? I did so in Windows 10 many times for folks who just want the blasted thing to boot up.
I believe so.
Apparently, in a new development build of Windows 11, Microsoft has blocked any bypass for installing/activating on non-TPM machines. That “feature” will likely get into the released versions.
Limited time only. Hurry, hurry, get your old versions of Windows 11 while they last.
The setup process probably forces a password, but I’d think you can go into user account settings afterward and remove it.
“Ken
February 13, 2024 at 4:19 am
If you set up a PC with only a local account, will you then get on-screen pop-ups or other “reminders” to set up a Microsoft account on the machine?”
“Geoff
August 20, 2024 at 10:35 am
Can the local account be set up with no password? I did so in Windows 10 many times for folks who just want the blasted thing to boot up.”
Last year I purchased 2 new laptops. One with Win 11 Home (wife) & the other with Win11 Pro (self). I set up local accounts on both during initial setup using the “I don’t have internet” option. Since they’re both used at home & don’t travel, I didn’t use a password for the local account on either one. I just hit enter with the password field blank & the setup continued. I don’t get any pop-ups or reminders to set up a MS account on either Home or Pro. Maybe it’s changed since then but I didn’t have any problems during or after setup.
I just got a brand-spanking-new Win11 after my Win7 machine croaked. At my request, the store set up a lical account for me, but I couldn’t be present when tgey set it up, so they gave the username “user.” Ugh!
My solution?
First, I used your “Shell:” shortcuts tip to access the Apps folder. (FYI, an actual shortcut didn’t work, but it did when I put the command into the “Run” box. I did manage to get a shortcut going after that, though I forget how.)
Within the Apps folder, is the ORIGINAL Control Panel, and in the Original Control Panel is the ALTERNATIVE “Accounts” App! THAT allowed me to create a new local accout (with my NAME on it) without any difficulty at all. It doesn’t even use security questions: just like Win7, it uses a “Password Hint”!
After making sure this was Administrator-capable (to use your term), I then used it to delete the original generic “User” account.
I also used your command prompt trick to activate the actual “Administrator” acvount; and lastly, I set up a third, “Family Or Guest” account with Normal User status, that has our old password.
So now my machine has three accounts: The everyday accout, bearing my name and a unique password; a Limited User account with our old password for when family or a frriend visits; and the Administrator account with a super-secure password for “shooting trouble.”
Two other things:
1. That “All Apps” folder trick has in turn given me access to still OTHER hard-to-access folders and tools, enabling me to build a pretty comprehensive “Utilities” folder! Thanks!
2. Ahem! About the 7th picture on this tip’s webpage — the one where you’re creating a password: What is this? An eight-character password!?! Have you lost your mind…?!? LOL!!!
Why is there not a class action lawsuit to end Microsoft requiring a Microsoft account? Or an anti-trust action in Congress? Users are sometimes stuck using Microsoft Windows. Something needs to be done, before I have to upgrade to Windows 11.
They don’t require a Microsoft account. They only make it difficult to activate Windows without one.
I have just ordered a new laptop, which will come with Windows 11 Pro pre-installed on it. I want to use a local account as I have for years. In this situation, how do I accomplish this?
Normally when you get a new computer the setup process allows you to choose between local account or Windows account. If not you can set up a local account under Users in Settings.
I have HP Envy x360 laptop with windows 10 installed. I set up the admin account as a local, and the account in my name an account attached to google. I tried using the windows 11 installation media approach and viewed the You Tube from a few people. Well what appeared is the disk drive management page with a hand full of partitions. Tried to figure out which ones I didn’t need and except for the minimum size not support or suggestions. Not a lot of help.
Finally choose the windows 11 installation Assistance and expected to have to re-install windows 11 with the media USB stick drive I make to get a local admin account. Well it maintained the two accounts with the admin a local account and the account in my name attached to google. Didn’t even ask. Very little clean up like putting two Icons that some how didn’t end up on the task line and the desk top.
Your update video is very clear and easy to understand. I just received my new computer with Windows 11 Pro already installed. After it booted up and asked me for my country, I followed your advise and hit Shift-F10 and got to the Windows command prompt. But when I try typing anything into the command prompt nothing appears. Is there anything else I need to do to be able to type something in here? Or has Windows already blocked this workaround? Thanks
The command prompt appeared? Did you click on it?
Like Larry (Nov. 26), on Dec. 19 2024 I’m finding I cannot enter anything into the Shift-F10 (or Fn-Shift-F10) command prompt. Somehow after ~90 minutes of trying various things (using the ALT ### from keypad, Windows key-X & selecting Powershell, then launching CMD.exe, and some other steps I can’t recall – I was able to enter the “oobe/bypassnro” command, and the system rebooted. This was all made much harder because I didn’t have a mouse and the laptop touchpad isn’t yet working.
I brought up the command window but then my kbd did not react. Took some attempts to realize I had to click the window, the country selection window behind was still in focus. When I got that, the rest was as per description – Thanks!
oobe/bypassnro no longer works. But the good old “net” command still does.
Disconnect your network before installing. When you get to the network connection screen, press Shift+F10 and type the following commands in order, replace “username” with your desired username.
1. net user “username” /add
2. net localgroup “Administrators” “username” /add
3. cd oobe
4. msoobe.exe && shutdown -r
The system will reboot. You will then get a login error and Windows will drop you to a login screen. Select your new account and continue with the setup as usual.
If you want to set a password for your local user, use command:
net user “username” “password”
Credit goes to PC World for this tip.
Microsoft’s game of whack-a-mole continues. Note that older techniques may still work. I’m not sure exactly what it depends on, though perhaps how recent the setup image is might be the most obvious.