It’s quick and easy.
In a prior article, we turned on File History. Since then, our computer has been carefully looking for files that have changed since the last time it looked and making backup copies to our external drive of any that have changed.
Great. So how do we access those backup copies when we need them?
There are two ways: one from File Explorer and one from the File History app. Both are fairly straightforward.
Become a Patron of Ask Leo! and go ad-free!

Restoring files using File History
- Method 1: In Windows File Explorer, right-click the existing file, choose “Restore previous versions,” and select the version you want.
- Method 2: Search for “Restore” using the Start menu search, click “Restore your files with File History” when it appears. Browse available folders and dates and use the Restore button to get your file back.
Remember that File History isn’t a full backup solution; it only restores specific folders and individual files.
Restoring an old copy of an existing file from Windows Explorer
Probably the simplest scenario is when you need an older copy of a file that still exists on your hard drive. Perhaps you made changes to it that you want to “undo”; perhaps the file was overwritten by something else; it really doesn’t matter what happened. What you want is a copy of the file “as it was” at a specific time in the past.
Fortunately, you had File History turned on, and the file you’re concerned about was in one of the folders that File History backs up.
Locate the file in Windows File Explorer and right-click on it. In Windows 11, click on Show more options and then click on Restore previous versions. In the example below, I’ve right-clicked on the file “some text.txt”.
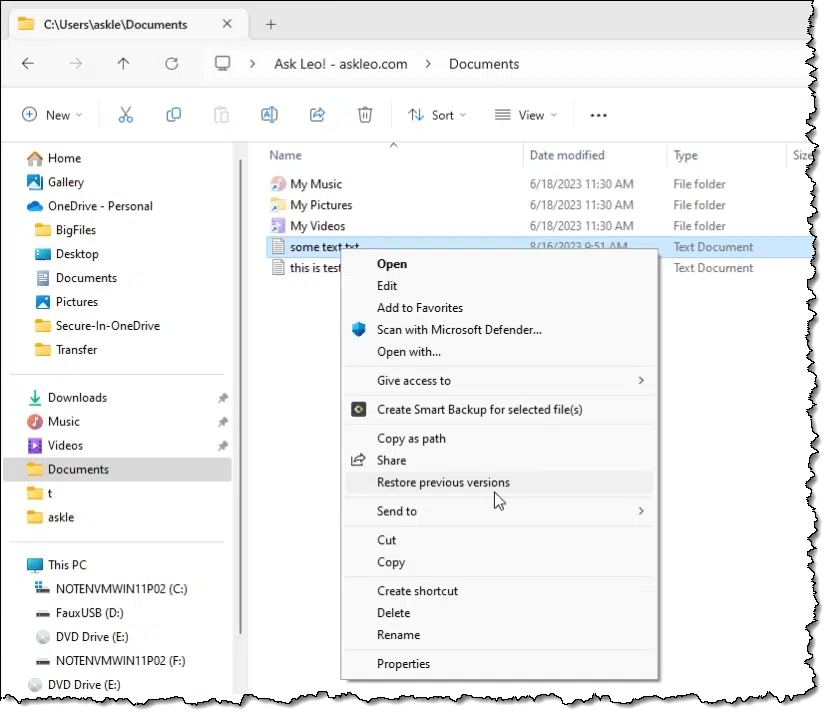
This will open the “Previous Versions” tab of the Properties dialog, listing the current version and any previous versions of the file that are available from backup.
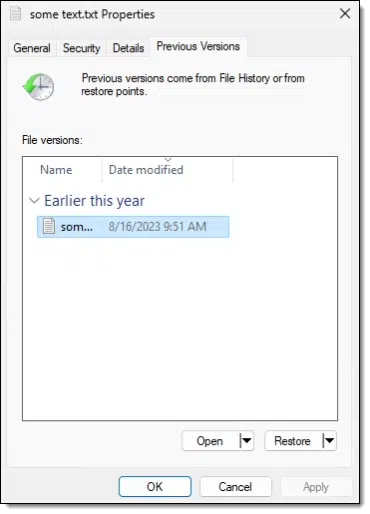
If only one file is listed and its date and time match the file as it exists on your hard drive, then you have no additional backup copies from which you can restore.
If there are multiple copies listed, or the date listed is prior to the current date of the file, select the version of the file you want to restore, and click the Restore button.
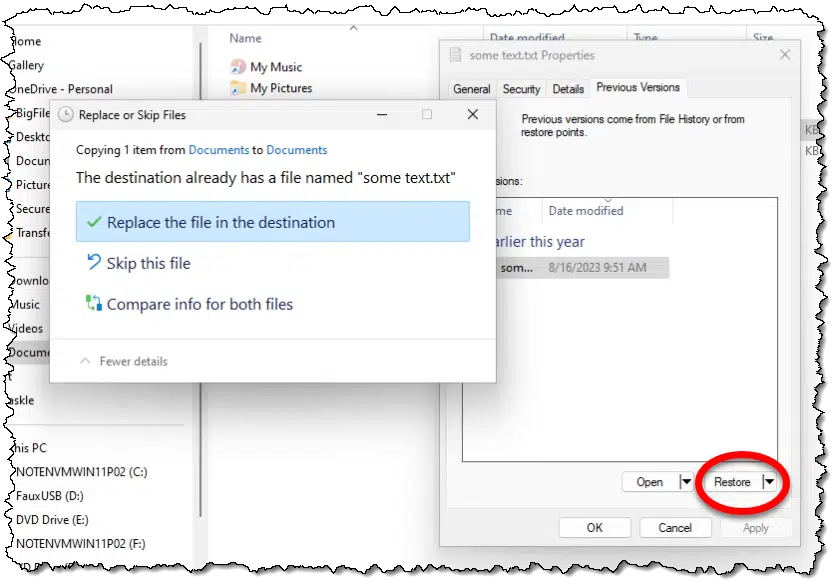
Since the file already exists, you’ll be able to choose how to restore it. Typically, “Replace the file in the destination” is what you want, but understand that this will overwrite the current version of the file.
Clicking the arrow next to the Restore button exposes a “Restore To…” option, which opens a “Save As…” dialog box. This way, you can save the backed-up copy as an additional file, either in a different location or with a different name, without affecting the current copy of the file.
I recommend using the restore options when retrieving a file from File History.
The Open button (also shown above) includes two options: opening the file directly from the backup without restoring it, and opening the file in File History, which we’ll examine next.
Browsing File History
If the file you want to restore has been deleted (in other words, there’s nothing to right-click on in the approach outlined above), or if you just want to browse around and see what File History contains, there’s an alternate approach.
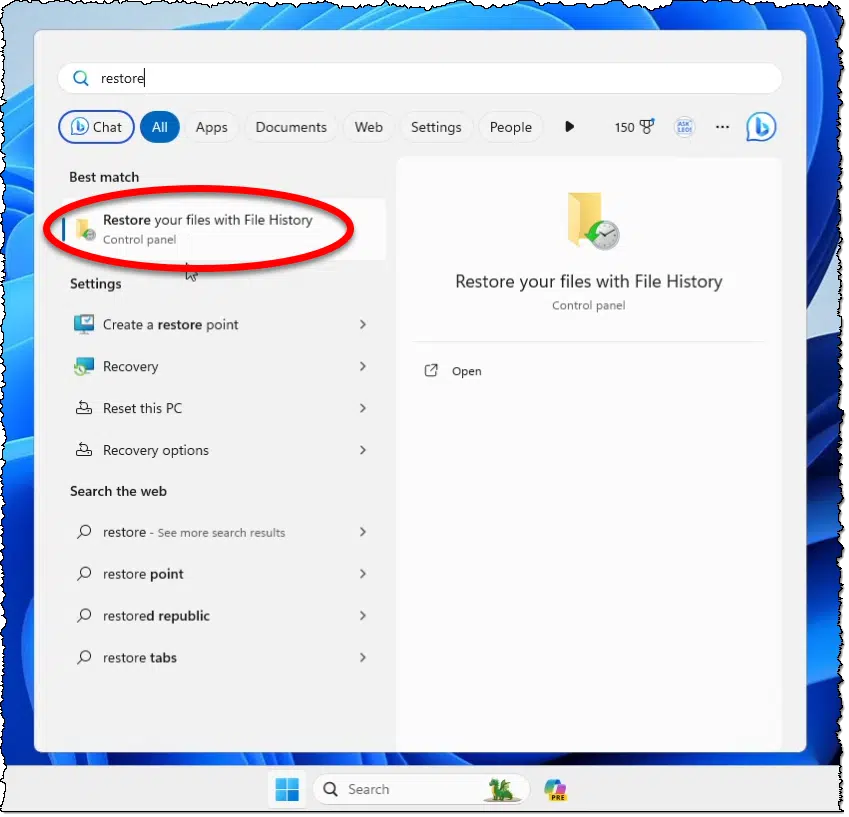
Click on the Start menu and type “Restore”. When it appears, click on Restore your files with File History.
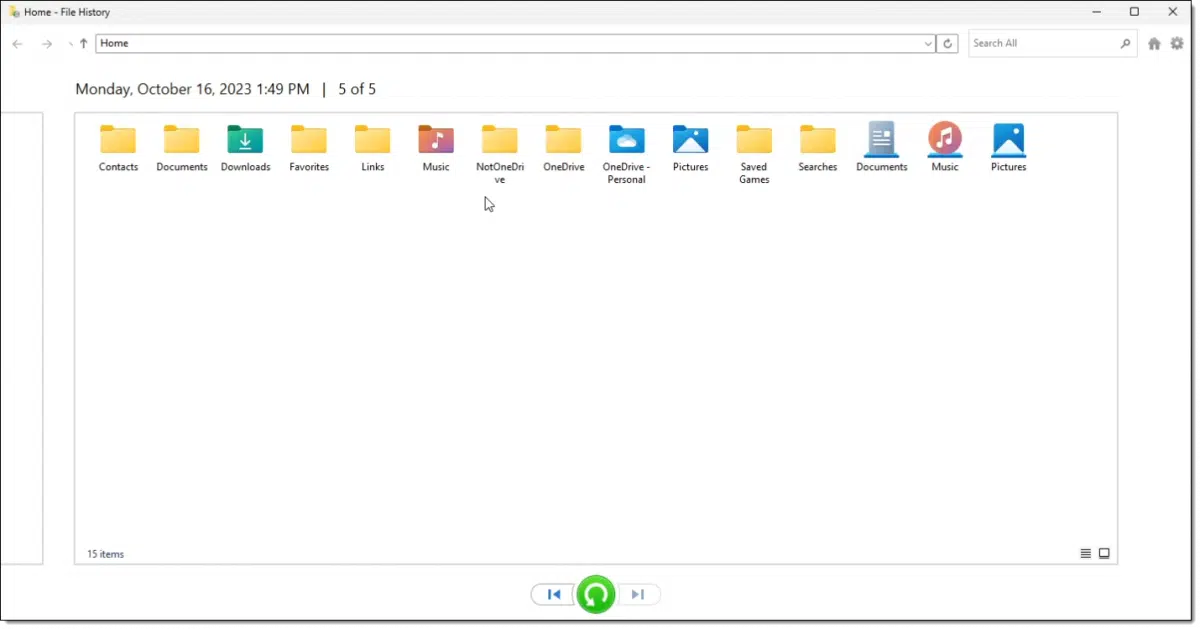
This will open the File History browser, where there are several items of interest.
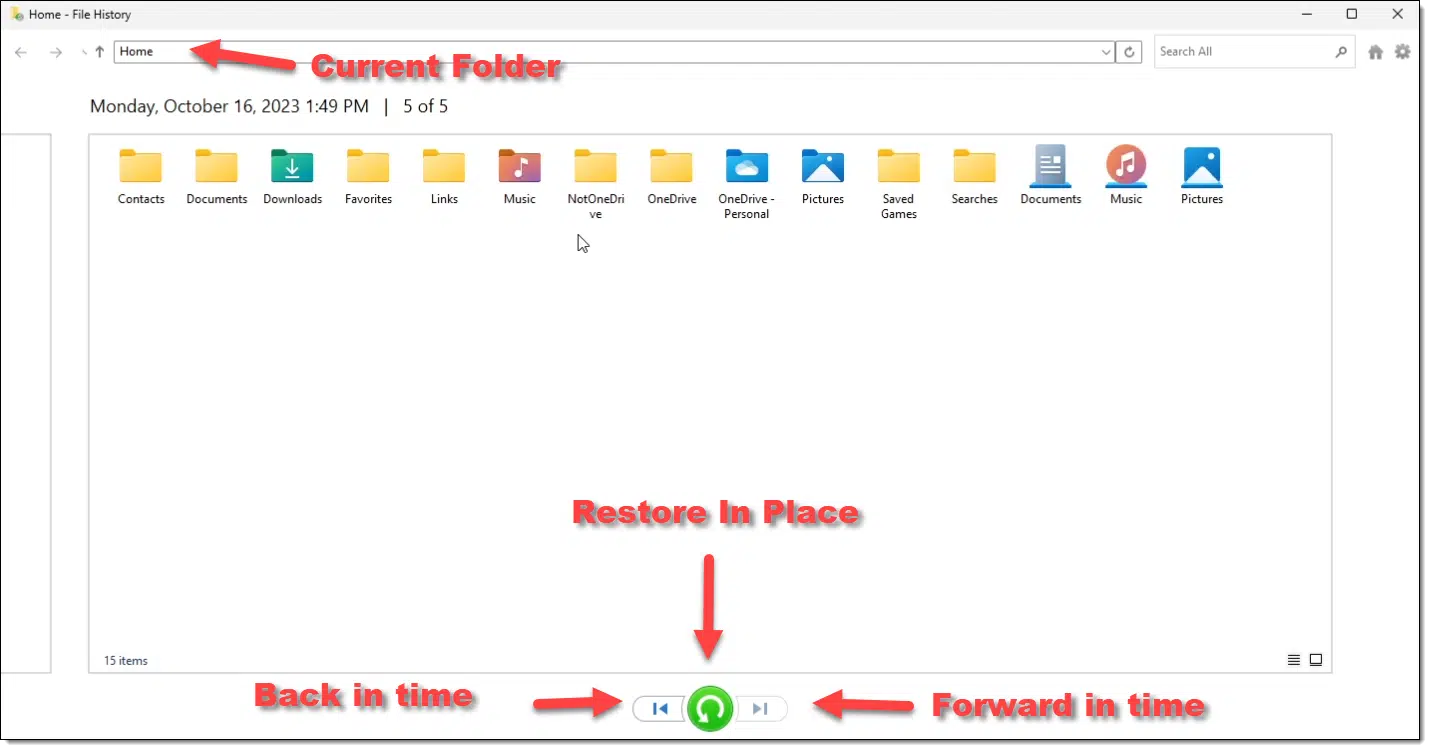
At the top, the browser lists the current folder being examined. “Home”, the default location, is the folder located at “C:\Users\<your login name>”.
Beneath the current folder is the date and time of the current backup copy being viewed, along with a count of and position within the backups of this folder that are available. In the example above, this is the 5th, or most recent “snapshot” of the files, and there are 5 total.
Next is a display, much like Windows File Explorer, of the contents of the folder.
Centered below the file list are three buttons:
- The left-pointing arrow changes the contents displayed to the next most recent backup moving backward in time.
- The green “restore” button restores the currently selected item back to its original location on your hard drive.
- The right-pointing arrow changes the contents displayed to the next newer backup moving forward in time.
Using the arrow keys, you can browse through the history of the displayed folder. Then use the restore button to restore any file you want.
To navigate into a folder shown in File History — say the “NotOneDrive” folder, in the example above — simply double-click on it in the file display.
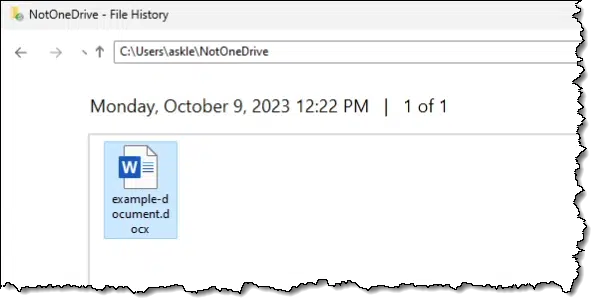
Now you can click the “Back in time” arrow to move into the folder’s history. Previously deleted files may appear.
Click on a file you want to restore, click on the green Restore button, and you’ll have recovered the file from File History.
You can continue to navigate through your File History by typing folder locations into the current folder box at the top, if you like, or by clicking on the grey up-arrow to its left to move back “up” in the folder tree, and then clicking on other folders and sub-folders as you like. In each folder, you can navigate through the backed-up File History by clicking the forward-or-backward-in-time arrows.
Do this
It bears repeating that File History is not a substitute for a complete image backup. File History only backs up the contents of specific folders. Anything outside those folders is not included.
When you set up File History, you control which folders are included, but as we’ve seen above, even if you were to have it attempt to back up almost everything (not recommended, due to disk space and time) you’re limited to restoring individual files or folders only. Restoring your operating system, or programs that have been installed via a setup program, is simply not what File History is intended for. That’s a job for a complete image backup.
Subscribe to Confident Computing! Less frustration and more confidence, solutions, answers, and tips in your inbox every week.
Podcast audio

Related Video


Warning: Make sure that the external hard drive you have connected to your computer is actually connected and working! I transport my laptop between home and work. When it’s at home, I have it connected to an external hard drive that stores the File History. This drive is connected to the laptop through a powered HUB, since the hard drive does not have its own power source. My backups had been going on without a problem for months, when the monitor I also connect the laptop to started flickering. I discovered that the HUB’s power source, a wall charger, had become faulty, and immediately replaced it. What I did not realize was that the wall charger had been failing for approximately two weeks before the monitor started flickering. I only found this out when I went to recover a version of a file from file history, and there was a two-week blank period that coincided with the wall charger’s “death.” Luckily, I also store my important files in OneDrive, so I was able to use the restore function it provides to recover the file. Make sure your hardware is not faulty!
I don’t use File History. I take regular system image backups and have all my personal files in OneDrive (Documents, Pictures, Music, Videos, and Downloads).