It’s always frustrating when making things “bigger” makes them smaller instead. As newer displays have much higher resolution than we’ve seen in the past, yours is a very common reaction when people get new machines.
Fortunately, Windows 10 has made this easier to deal with than in previous versions.
When we’re done, icons and text will indeed be bigger, and everything — especially photos — will be crisper and clearer than ever before.
Pixel density
First, a very quick overview of what’s happened.
Let’s say your laptop’s display is about 14 inches wide by about 8 inches high.
On older devices, your computer might have been able to display 1400 pixels across by about 800 pixels, which is about 100 dots (pixels) per inch, or “DPI”1. An icon that might be 64 pixels square would take up about two-thirds of an inch square. That doesn’t sound terribly big, but when displayed on a computer screen, it’s not bad, and possibly something close to what you’re used to.
Your new computer now packs more pixels into that same 14-x-8-inch area: 3200 x 1800 pixels. That works out to (very roughly) 225 pixels per inch: more than twice as dense as before. That 64×64 icon will now take up a hair over 1/4 of an inch. And yes, that’s pretty tiny, even if your eyesight is great.
Windows 10 offers two common solutions.
What not to do
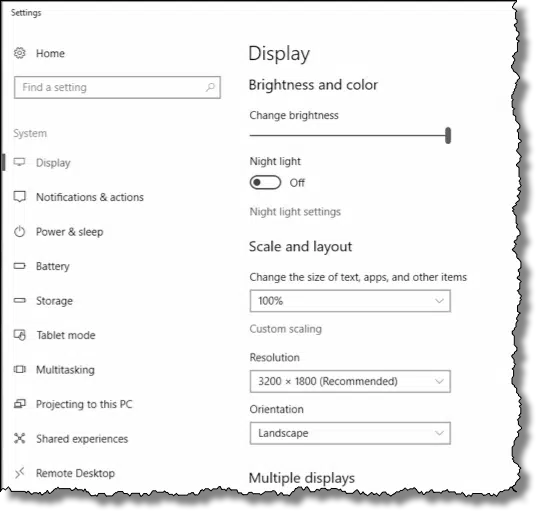
Right-click on an empty area of your desktop and click on Display settings in the resulting pop-up menu. True to its name, that will bring up the Display settings dialog.
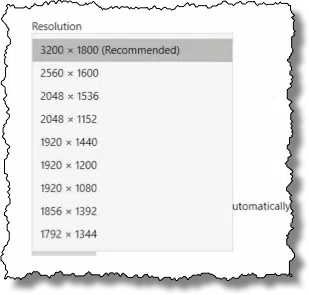
One of the items there is labelled “Resolution”. Click on the current resolution and you’ll be presented with a drop-down list of available resolutions.
Your list will almost certainly be different. You can see that in my list, the “3200 x 1800” resolution is labelled as “Recommended”. That’s because 3200 x 1800 is the native resolution of the display. It physically has 3,200 by 1,800 pixels, and nothing will change that.
Changing the resolution, say to 1920 x 1080, tells the hardware, “Treat my 3800 x 1200 screen as if it had only 1920 x 1080 pixels”. Now Windows will provide only 1920 x 1080 pixels of information for the hardware to deal with. Typically, that means the video display hardware will stretch across the 3800 x 1200 physical pixels on the display.
The good news is that our 64 x 64 icon will also be stretched, and will look larger, as we wish.
The bad news is that the hardware has to play games that either make things look a little fuzzier, disproportionately wide or high, or sometimes add a black bar at the top and bottom, or left and right, of the display.
Changing the resolution can be a useful tool for some things, but it’s not the only tool, and it’s not the first tool we want to try. There’s a better way.
Scale instead
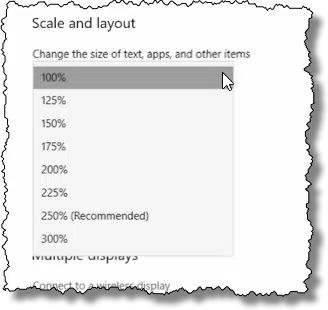
Immediately above the Resolution dropdown in Display settings is another setting: “Change the size of text, apps, and other items”. Click on that and you’ll be presented with a list of percentages.
Once again, the list you see may be different than that shown here, but the idea is the same. This list allows you to instruct Windows to make things bigger by some percentage.
The difference here is that Windows still considers the display to be at its native resolution. In my case, that means it’ll continue to give the 3200 x 1800 display exactly 3200 x 1800 pixels of information. It’ll be Windows that makes things larger, by using more pixels to draw them. At 250%, for example, our 64 x 64 icon will take up 160 x 160 pixels of space, having been scaled up by Windows.
You can see the difference almost immediately, as the settings dialog box itself scales once you click on the new scaling factor.
Rather than just scaling the entire display, Windows is able to do a much better job making things bigger not by just stretching them, but by rendering them at the larger size. For example, fonts will look crisper scaled this way, because they’ll be drawn using all the available pixels the scaled resolution allows them to use.
A word about signing out
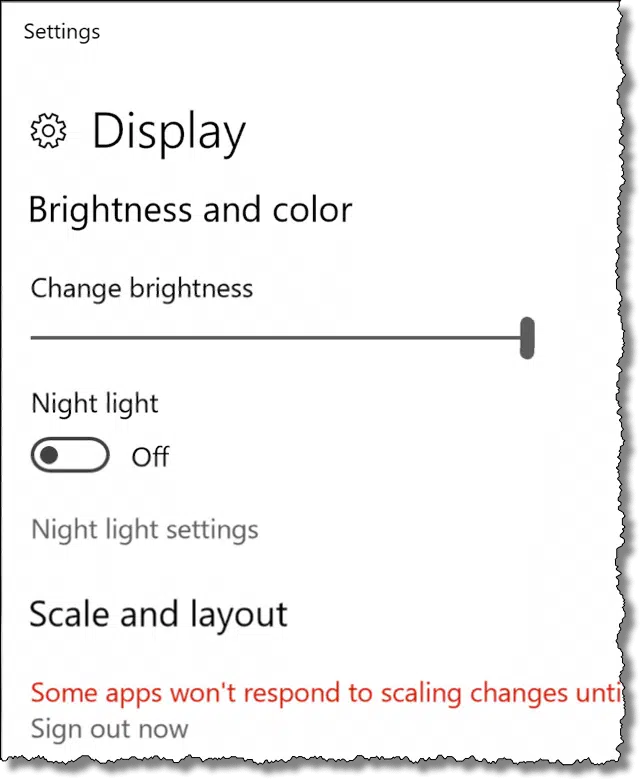
Partially obscured in the image above is the phrase, “Some apps won’t respond to scaling changes until you sign out.”
Scaling affects almost everything you see, and much of that was calculated or set in place when you logged in. Many things — like the Settings dialog itself — will respond to the new setting immediately. A few things will not. In my experience, these typically show up as odd-looking or fuzzy characters and other graphical elements.
There’s nothing wrong with not signing out. You can continue to use things as they appear, but for the best-looking experience, you’ll want to sign out or reboot for all changes to take effect.
Do this
Subscribe to Confident Computing! Less frustration and more confidence, solutions, answers, and tips in your inbox every week.
I'll see you there!
Podcast audio
More for Patrons of Ask Leo!
Silver-level patrons have access to this related video from The Ask Leo! Video Library.
Making Things Look Bigger in Windows 10


The techniques that you outline in this article aren’t new to Windows 10, Leo. I recall these same features being available in Win 7. Or something very similar.
They were very well hidden, and exposed terms like DPI and the like. But yes, this is a newer UI that’s easier to find.
My drop down box does not have a “display settings” on the list???
Windows 10? Right click on an empty area of the desktop? If so, then this may be a limitation of your video display driver, but I’d be very VERY surprised.
Leo:
I always appreciate your advice, alerts, etc. For an old dude trying to be a semi-qualified user, I need all the help available.
I do have a question. When I click on creating an email, the text size is much too large. I have to click and scroll to a smaller tyxt size so the info does not appear to be for a sight-impaired individual.
Surely there’s a way to secure the proper text size… can you share that with me?
Depends on what email program or interface you use. Assuming it’s the web browser (and some email programs) try CTRL+- meaning hold down the control key and type the minus key to make things smaller. (plus to make ’em bigger, 0 to reset to normal). If that doesn’t work for you let me know how you read your email – what service, and what program (email program or what browser).
Hi Leo
Excellent advice but I still have a problem.
I cannot see how to enlarge the ridiculous narrow lines of my toolbars— any suggestions? — regards— Peter
So I broke my laptop screen and now use it hooked up to my TV with a HDMI cord. I tried to adjust the settings so everything from the laptop screen would fit on the TV screen. Only problem is I adjusted the resolution too much and it made everything so big that I can’t go back to where I was to adjust this. Anyway I can get my screen back right? I tried CTRL + or – didn’t work, if I’m doing it right? Any help would be appreciated.
Starting in Safe Mode would be the next thing to try. Or carefully remembering the keystroke sequence so as to manipulate things you can’t see (which is really REALLY difficult to do).