Internet Explorer is present in every copy of Windows, even Windows 10. Even though Microsoft has been pushing it’s Edge browser very hard, many people prefer the familiarity of Internet Explorer.
Like every browser, IE as a cache, and sometimes that cache can get “confused”.
Clearing the browser cache is the fastest way to un-confuse it.
Clearing the IE cache
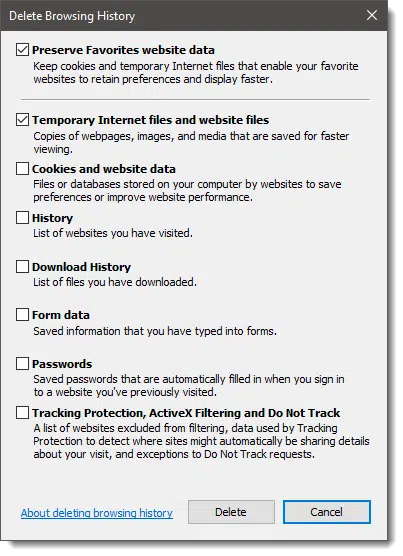
Type CTRL+SHIFT+Del to go directly to the Delete Browsing History dialog, below.
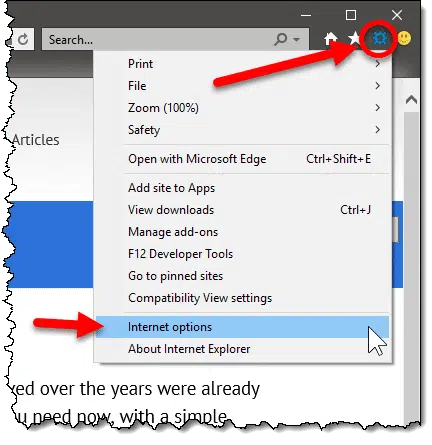
Alternately you can reach that dialog in Internet Explorer by clicking the Tools menu (or click the gear icon in the upper right of the Internet Explorer window), and then the Internet Options menu item.

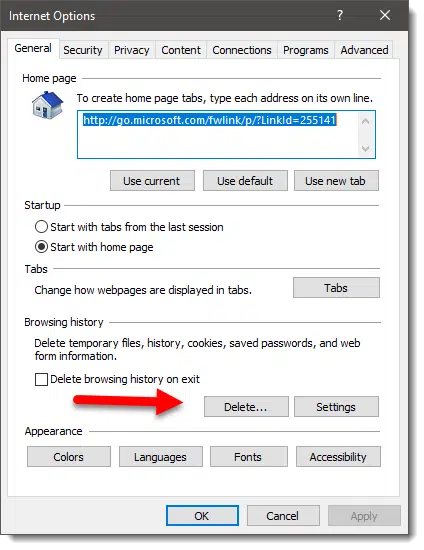
In the resulting dialog box, under Browsing History, click the Delete… button.

In the resulting Delete Browsing History dialog, it’s the “Temporary Internet files and website files” item that specifically refers to the browser cache, so check it. You can select or deselect other items as you see fit.

Click Delete.
IE’s cache has been cleared.
Why clear the cache?
You generally won’t need to clear IE’s cache. When all is working properly IE manages the cache, making room as needed.
Clearing Internet Explorer’s cache is a diagnostic tool you might use when things don’t seem to be working properly. For example if pages aren’t displaying properly, or entirely, or just seem excessively slow, or otherwise broken, clearing the browser cache is an easy first step. It harms nothing, and might fix things.
Since the cache is only a speed optimization, the only side effect of clearing the cache might be a temporary performance hit: pages might take just a little longer to load the first time you visit them after the cache has been cleared.
