When you want the text, not a picture of the text.

When people ask me questions, I frequently ask them for the exact text of the error messages they’re facing. “It said something like” is almost never enough.
My go-to solution is the screenshot. A picture really is worth a thousand words when it comes to troubleshooting.
But what if you don’t want to (or can’t) send a picture?
There’s a solution for that.

Copying text from images
If you see text on your screen but can’t copy it, use Windows’ Snipping Tool. Press Shift + Windows + S, select the text area, and click “Text Actions” to extract the words. You can copy and paste the result into a message or search. While not perfect, it’s very good (and getting better) and saves a lot of typing.
It starts with a screenshot
This is useful for much more than capturing the text of an error message to send to someone like me; this technique applies to any text you can see on your screen. In fact, the example we’ll use is not an error message.
The process begins with the Windows Snipping Tool.
With the text you want to capture on the screen, type SHIFT+![]() +S to run the Snipping Tool.
+S to run the Snipping Tool.

Make sure that the camera is selected to take a photo. I recommend you use the “Rectangle” mode to select the area to be snipped.
Draw a rectangle around the area containing the text you want to capture.
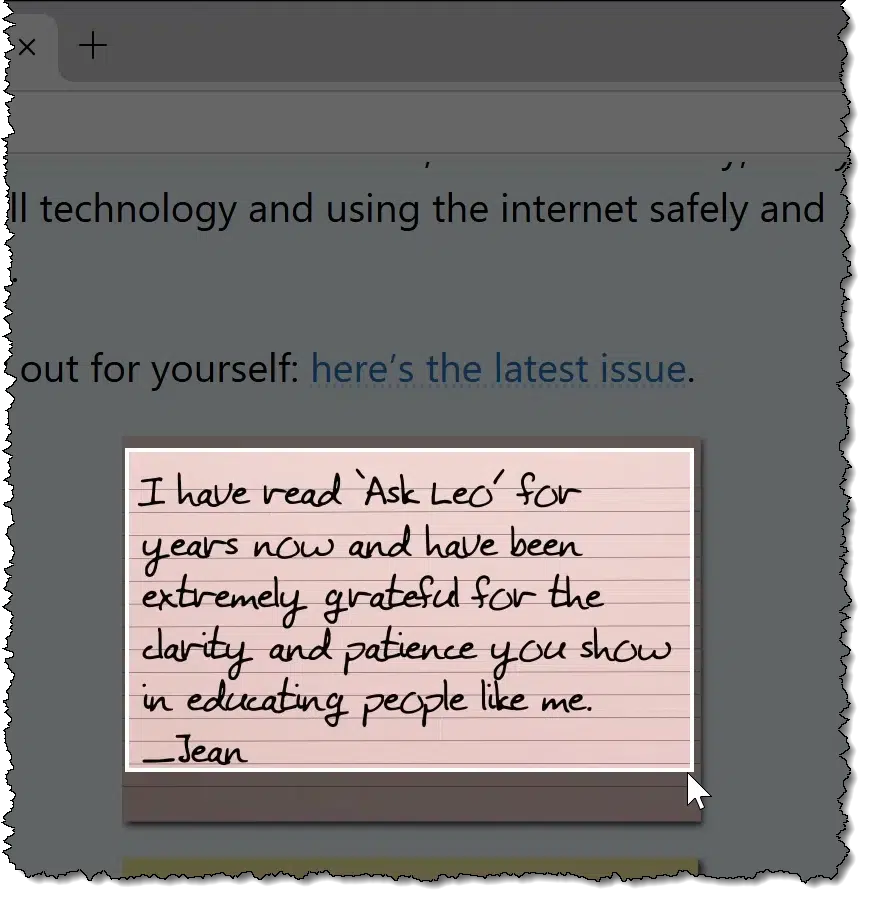
Try to avoid including areas that aren’t part of the text you want, though this is sometimes impractical.
When you release the mouse after creating the rectangle, the Snipping Tool takes the screenshot.
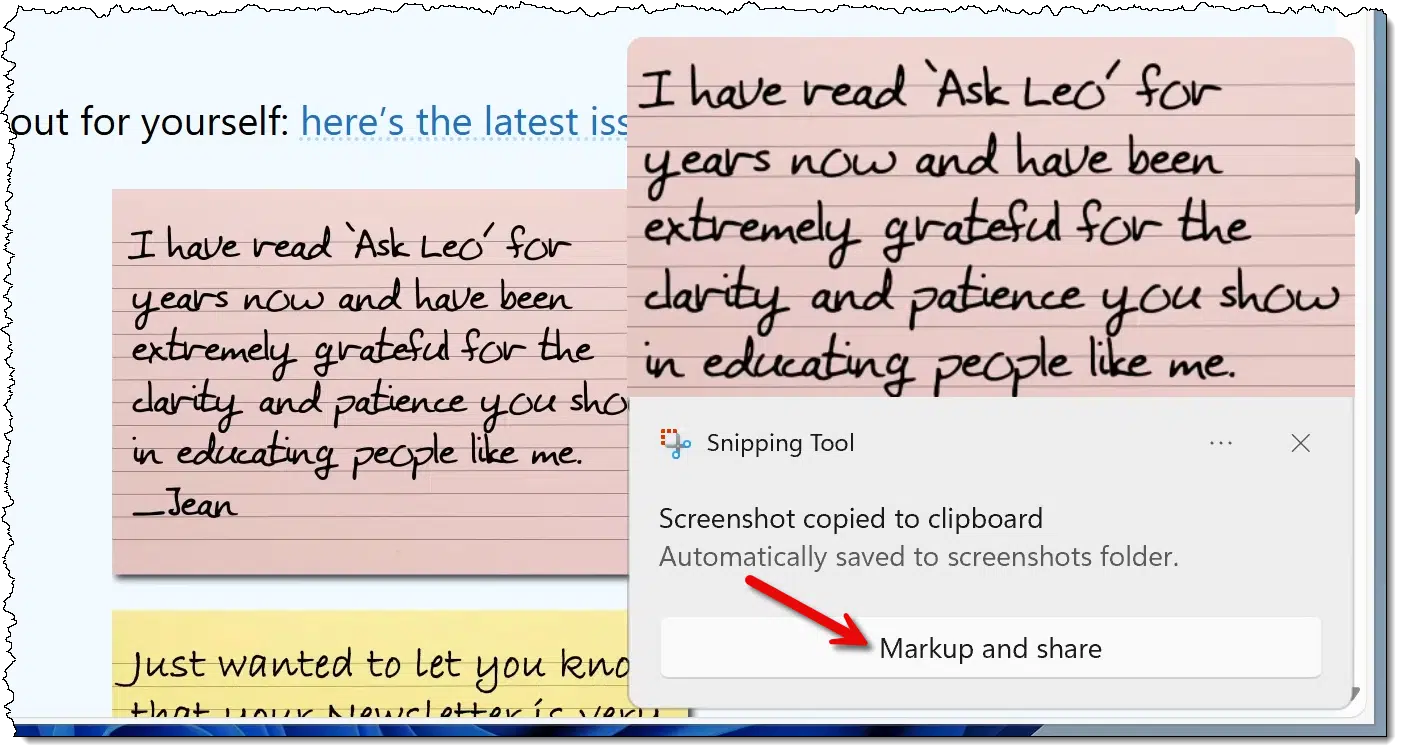
The screenshot has been placed in the clipboard and saved to the screenshots folder. That’s not really what we want this time. Click on Markup and share to take the next step.
Grabbing text
The Snipping Tool editor is displayed. Near the bottom is an odd-looking icon for Text Actions.
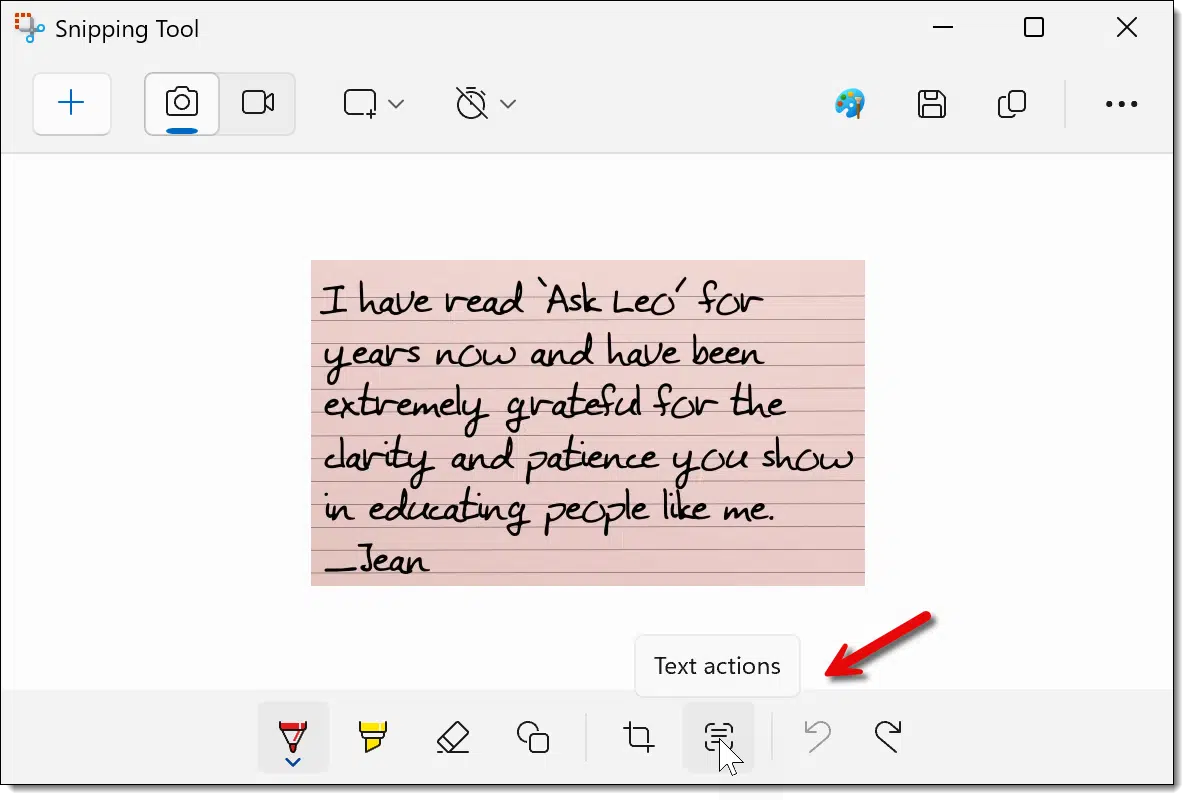
Click on that button. Using OCR, or Optical Character Recognition, the Snipping Tool will attempt to recognize the text in the image.
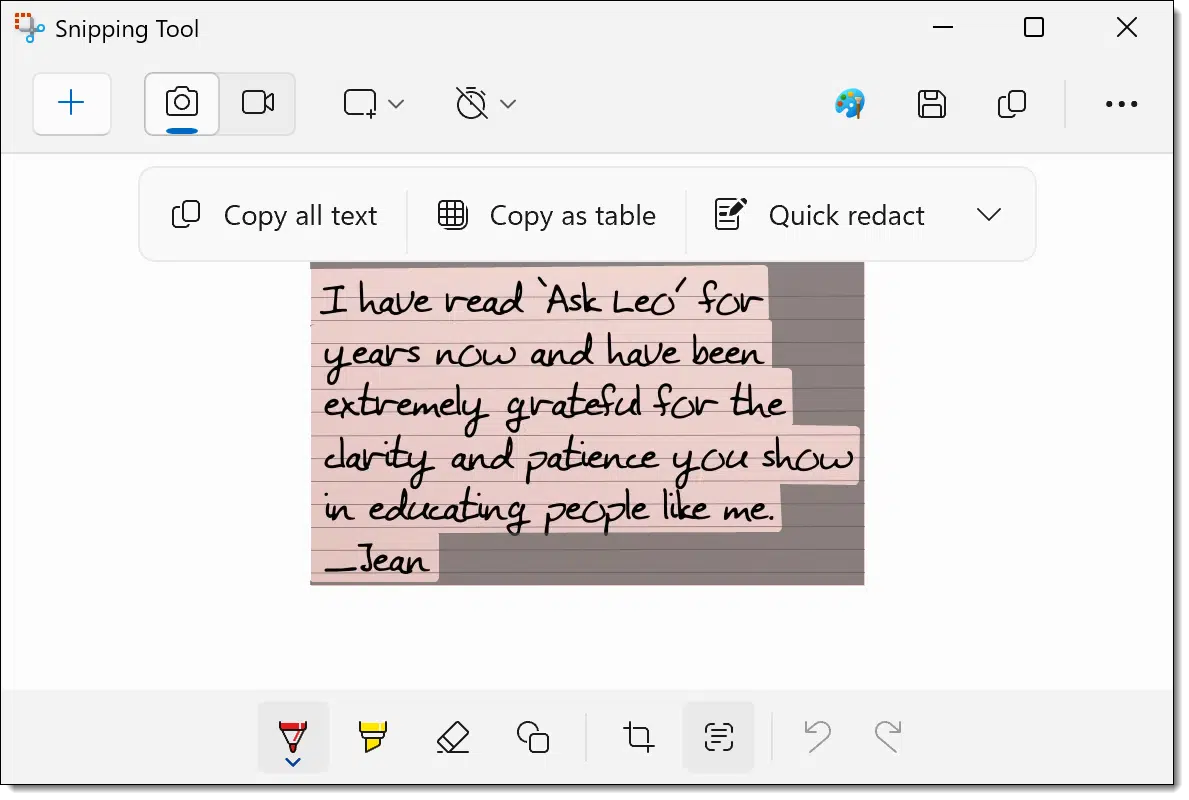
The text it recognizes is highlighted. In the example above, all the text in the image has been recognized.
Click on Copy all text to copy the text (not the picture) to the clipboard.
Now what?
Using the text
What happens next depends on what you need the text for. You might:
- Paste it into the “ask a question” form on Ask Leo!
- Paste it into a search engine as part of a search query.
- Paste it into a message you’re composing to someone.
- Paste it into an online forum posting where you’re asking for assistance.
- Paste it into Word or some other document to save it.
- Paste it into Notepad to see what you got.
Here’s an example of that last one.
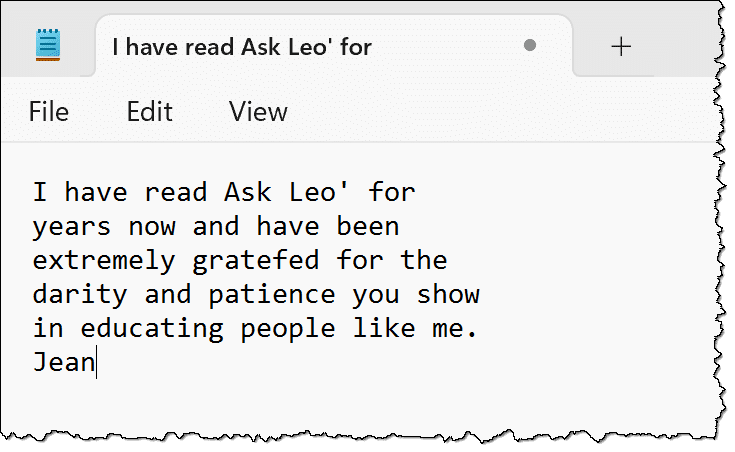
Notepad doesn’t support images, so you know that’s only text — the text that Snipping Tool extracted from the screenshot you took.
Related

What’s a Screenshot, and How Do I Take One?
A screenshot -- an image of your computer screen saved as a picture -- can eliminate a lot of frustration.#2080
Caveats
OCR has come a long way, but it’s not perfect.
I chose the example image I did because it’s not “clean” text. It’s a handwriting1-style font, which means it’s harder to recognize. And while Snipping Tool did a pretty good job, it wasn’t perfect: it missed an opening quote mark, misrecognized “grateful” and “clarity”, and lost the underscore in front of “Jean”.
The lesson, of course, is to proofread what’s been captured. The good news is that typically needs a simple edit or two rather than retyping the whole thing.
The bigger the text, the better OCR results will be. Thus, this line of text is easier to scan than this line of text. While it’s not always an option, if you can make something bigger before a screenshot (like CTRL+ and CTRL- in your browser), do so.
And finally, if the text recognition just isn’t working for you, remember: you still have a screenshot you may be able to share instead.
Alternatives
The Snipping Tool isn’t your only approach; here are a few others.
- PowerToys includes a Text Extractor that I find somewhat more convenient, as it bypasses the screenshot and immediately places OCRed text into the clipboard.
- Snagit, the commercial screenshot tool I use constantly, includes the ability to “Grab text” from any image, including screenshots.
- ChatGPT, and probably other AIs, do amazing things with images and OCR. I’ve seen them take horrible handwritten content and extract nearly perfect text. For now, the process is to upload your screenshot to the AI for it to process, but I expect this function will be embedded into the in-browser AIs or even in-system AI tools in short order.
There are many, many ways to extract the text you can see on your screen.
Do this
Remember that this functionality exists and has become very powerful. Particularly when faced with an obscure, complex, or lengthy error message, it’s a great way to capture what’s happening in preparation for asking for help.
Subscribe to Confident Computing! Less frustration and more confidence, solutions, answers, and tips in your inbox every week.
Podcast audio

Footnotes & References
1: Literally: it’s a font based on my handwriting of ~20 years ago.

Thank you so much for your kind advice, Leo! It has been very helpful: I did not even know of such a tool or even that such technology existed for the amateur learner. A blessing on you and your family as well as your business, sir –and much happiness and success!!
I tried doing this, but the option to markup and share is not available. Using Windows 10. Any one able to help? This would be a really useful tool!
I believe these instructions are for Win 11 only. What say you, Leo? Mark?
I believe it’s only the Windows 11 Snipping tool that does this. PowerToys has “Text Extractor” which does the same, though, and should work in both 10 and 11.
Leo, you wrote:
“…it’s a font based on my handwriting of ~20 years ago.”
Heavens, dude! I hardly know where to begin! Yeek!
1. Did you create this font, or did someone else???
2. How was it done!?! (And especially 20 years ago?!?)
3. What prompted you to do that (assuming it was you that did it)?
4. Does the same program (or whatever) for converting handwriting to a font still exist?
…I mean, like wow!
I can’t get Windows 11 Snipping Tool to do this. As soon as I snip the rectangle selection, poof, no Tool left to work with, it just disappears. I’ll keep working at this since it’s SO USEFUL!
I don’t need Powertools to do this, do I?
-Robb
It’s a feature that’s beeing rolled out gradually by Microsoft. I don’t have it either on two of my computers.