Another way to organize your computer.
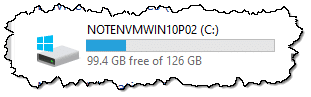
- My C drive has 465GB and E reserve drive of maybe 100GB
- I do not have any unallocated space anywhere
- Therefore I cannot partition the hard drive
- I want a partition with 100GB to put Windows and everything else for my data.
While I don’t do it myself, many people prefer to partition their single physical hard disk into multiple logical disks. The thinking is that a partition dedicated to the operating system can more easily be updated or restored from backup without involving all the data on another partition, which itself can be backed up separately without concern for the OS.
Creating a new partition is pretty simple if you have enough free space on your C: drive.
I’ll show you the steps using Windows Disk Manager.

Creating a new partition
To create a new partition, you can shrink your existing C: drive using Windows Disk Management (assuming you have enough free space). After shrinking, the unallocated space can be formatted as a new partition.
Free Space
I need to reiterate the need for free space on your C: drive.
While the C: partition in my example is 126GB, if I want to create a 50GB partition, I’ll need to have at least that much — ideally more — unused space. The new partition will be created from some portion of that free space. In my example above, there’s 99GB of free space, so a 50GB additional partition shouldn’t be a problem.
If you don’t have enough space to create the partition size you want, you’ll need to make room by deleting files. Read Where’s My Disk Space Going? for a tool and process to help identify what’s using the most space. Then decide what you can delete or move offline to free up space.
If your C: drive has more free space than your intended new partition, you’re in good shape.
Shrink the C: volume
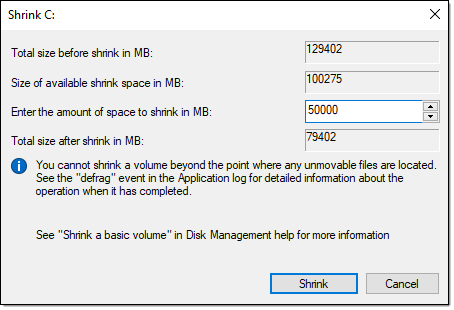
We start by shrinking the C: drive. I’ll decrease my 126GB C: drive by 50GB, which I can then use for a new, separate partition.
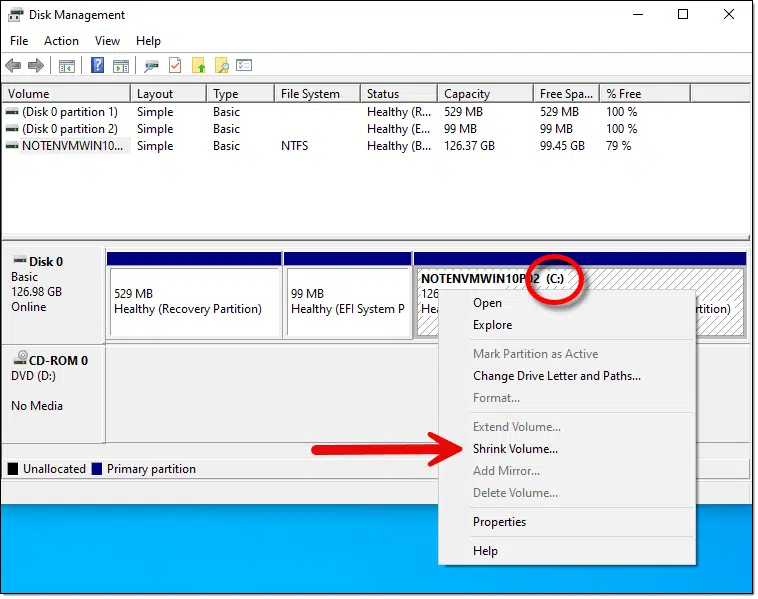
Right-click on Start and then click on Disk Management.
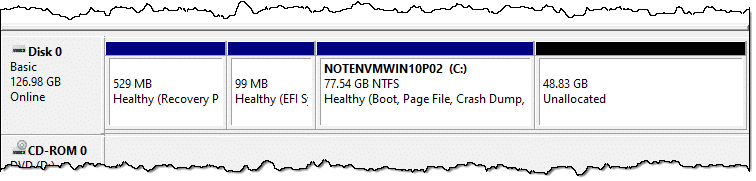
Disk Manager will display all the partitions on the physical hard disk. In the example below, the hard disk — “Disk 0” — has three partitions: recovery, EFI, and the partition containing the C: drive.
Right-click on the C: drive and click on Shrink Volume. (Volume in this context is synonymous with partition.)
Disk Manager then examines the volume.
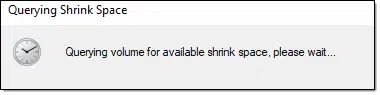
Disk Manager is looking to see how much smaller the drive can be made.
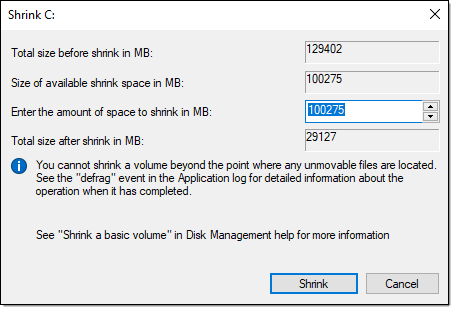
My 126-gigabyte example drive (129,402 megabytes, to be precise) could be shrunk by as much as 100 gigabytes, which would leave the existing drive at 29 gigabytes in size.
Enter the amount you want to shrink the drive. I’ve selected 50,000 megabytes, or about 50 gigabytes, in my example. Click on Shrink.
After a few minutes, Disk Manager will display two partitions where the old C: partition used to be: a new, smaller C:, and unallocated space.
Create the new volume
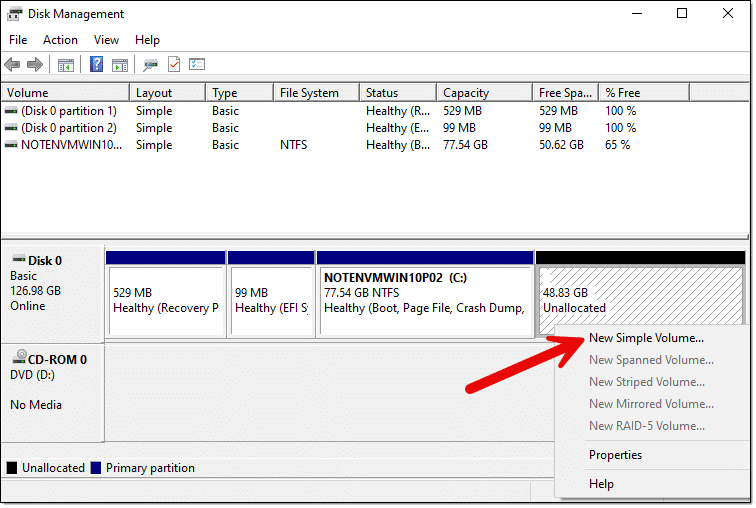
To use the unallocated space as a partition, we need to create a partition and format it.
Right-click on the unallocated space and click on New Simple Volume.
Click on Next to enter the resulting wizard, where you’ll be given the option to specify a size for the new partition.
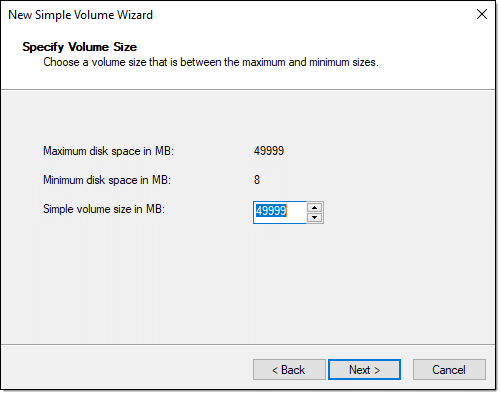
The default is to use all available space1, which is exactly what we want. Click Next.
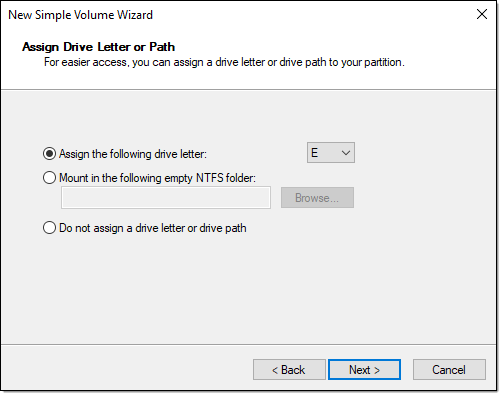
The next step is to assign the new partition a drive letter. The default is typically good enough, so click Next again to be taken to formatting options.
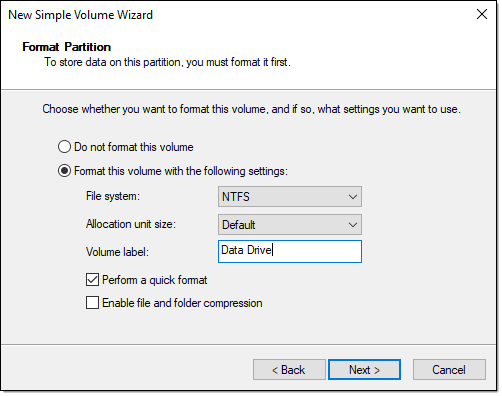
Once again, the defaults are probably just fine, though you might want to give the drive a different label to more easily identify it in Windows Explorer later. I’ve entered Data Drive.
Click Next to view a summary page; then click Finish, and the new drive is formatted and ready for use.
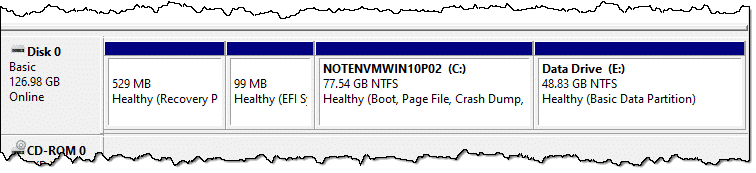
You can then open Windows File Explorer to confirm that the new partition has been created.
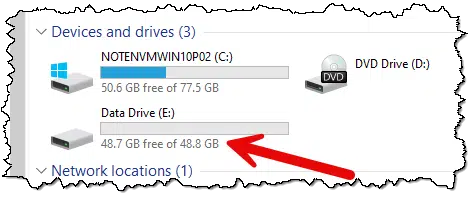
The partition has been created and set up as a new drive, E:, and the C: drive has become correspondingly smaller.
Do this
In general, I don’t see the advantages of a separate data partition as being greater then more efficient space use of a single partition and folders to organize your data. However, should you feel the need, now you can split that C: drive into pieces.
Subscribe to Confident Computing! Less frustration and more confidence, solutions, answers, and tips in your inbox every week.
Podcast audio

Related Video


Footnotes & References
1: You’ll note that 50,000, the size we specified, turns up as 49,999. Conversion between megabytes and gigabytes as well as rounding can result in the numbers being slightly off.
