Setting boundaries when there are no boundaries.
File History is a nifty feature in Windows 10 and 11 that allows you to designate a disk — typically an external disk — to act as a not-quite-real-time backup of the files you’re working on. Every time you change the file, that file is backed up within some period of time. If you’re working on a file continuously throughout the day, for example, File History might contain a snapshot of that file taken every hour all day long. You could recover any one of them if you wanted to.
There are many options you can set in File History, but limiting how much disk space it uses is not one of them.
We can work around that.

Reining in File History
File History can’t limit how much space it uses, but you can. By creating a separate partition just for File History, you can stop it from taking over the entire disk. It’s a simple trick that sets boundaries where Windows won’t.
Why do all this?
File History has several approaches to controlling what and how much is backed up.
- You can include and exclude locations containing files you do or do not want included.
- You can control how often File History checks for changes (between 10 minutes and 24 hours).
- You can control how long File History keeps backups (from one month to “forever” or “until space is needed”).
Regardless of those settings, though, it’s still possible to completely fill the drive you use for File History. If you’re also using that drive for other things, filling it up with File History will impact those other things.
By giving File History a dedicated partition, you limited its ability to impact what happens elsewhere. Here’s how.
Control Panel: File History
The old Control Panel is still around. Just click on the Start button, start typing control panel, and click on it when it appears in the results.
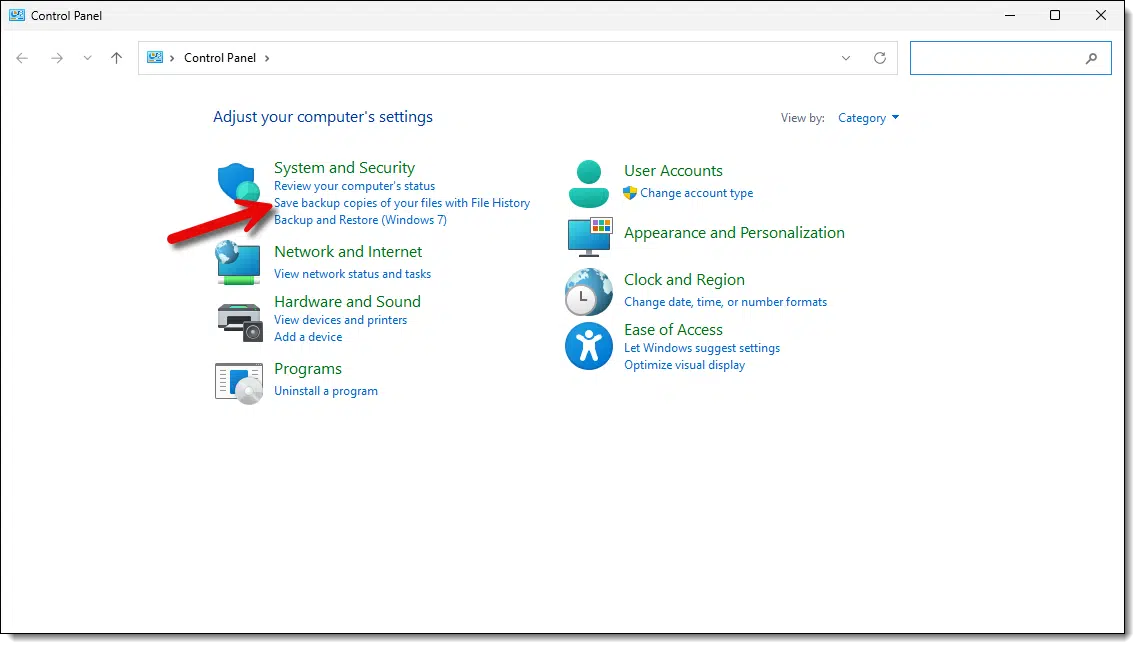
Under “System and Security”, click on Save backup copies of your files with File History.
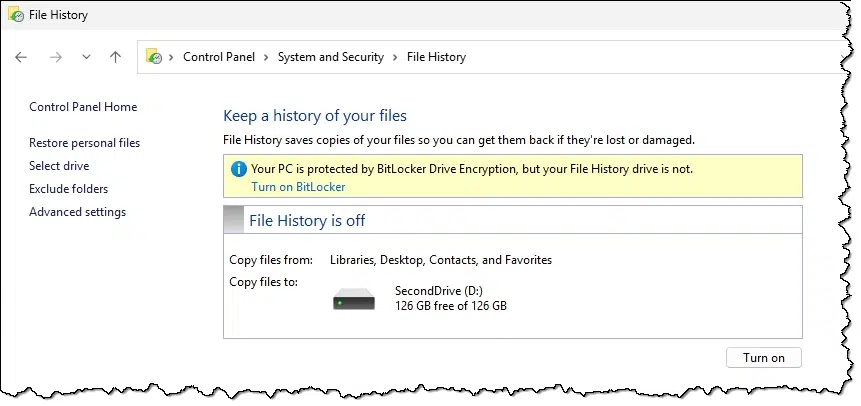
This machine has a second drive — drive D: — and File History shows that by default. It could be internal or external.1
This is the drive I want to use, but I would like to prevent File History from potentially filling it up completely and leaving me no room for anything else.
The solution? Partition the disk.
Disk Manager
I’ve discussed disk partitioning — specifically splitting one partition into two — before, so you’ll find step-by-step details at that link.
First, in Disk Manager, shrink the existing partition by the amount you want to reserve for File History.
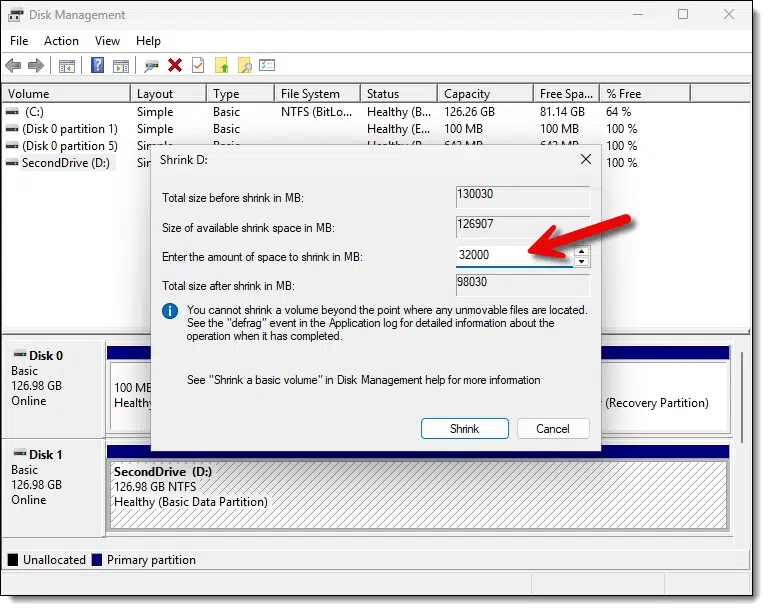
In the example above, I’ve selected “32000” megabytes, or roughly 32GB. The existing partition — the D: drive — will be reduced by that amount, leaving 32GB of unused space on the drive.
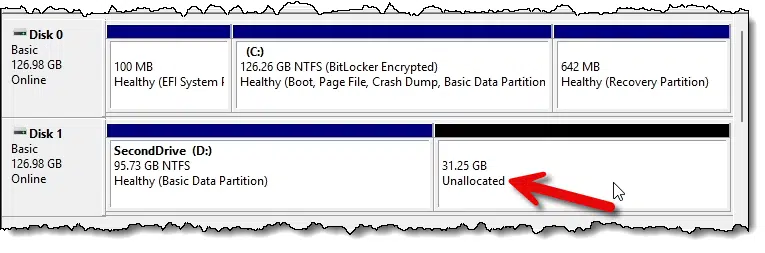
Then we create a “new simple volume” in that unallocated space.
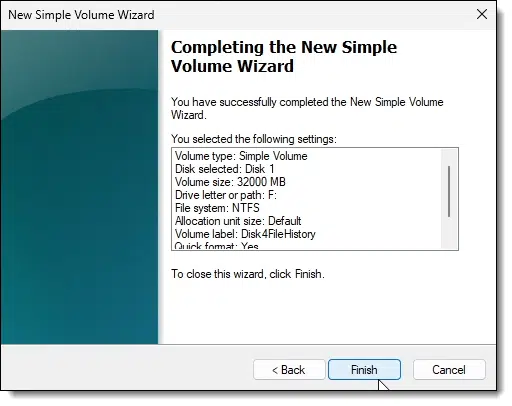
When complete, the original 128GB physical disk now appears as two separate drives.

- The original D: drive is now smaller at ~96GB.
- A new F: drive is ~32GB.
Now we can use that F: drive for File History.
Selecting the drive
Back in Control Panel’s File History setting, click the Select drive link on the left. This will bring up a list of drives available for File History to use.
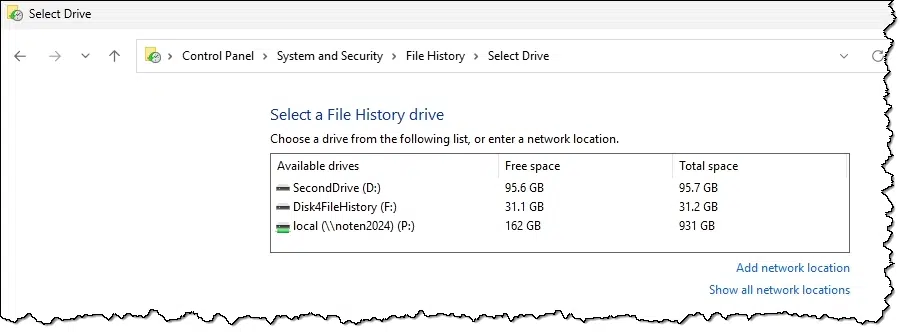
In my example, I’ll click on the newly created drive F:, followed by OK.
Then I’ll turn File History on.
Do this
Ideally, File History would use a dedicated external drive that you would use for nothing else. That can limit the usefulness of the drive, however. Now we’ve got a relatively simple workaround that allows File History to coexist on a disk drive that’s also used for other things.
Subscribe to Confident Computing! Less frustration and more confidence, solutions, answers, and tips in your inbox every week.
Podcast audio

Footnotes & References
1: The warning about BitLocker is because my primary drive is BitLocker encrypted, but the File History drive is not. This would imply that files backed up would not be protected by encryption. The solution would be to enable BitLocker on the drive we eventually choose as our File History drive.

Why does this File History thing remind me of OneDrive? Yet again, another bloated Microsoft utility to do something that you can either do manually or do using a simple script. Soon enough we’ll be hearing about the mess and disfunction that File History has created.
I’ve been doing this type of quick backup (like a scratch pad) on my computers for decades – with a flash/external drive in the back of the computer and a batch file script with an icon on the desktop. This is not a game changing, revolutionary idea that we were missing before Win 10/11.
“Manually or using a simple script” is well beyond what most people can, or are interested in doing.
If you make a daily image, you don’t need File History. You can turn it off from Control Panel. Of course, you can’t revert to a version a couple of hours age, but to me that’s OK.
Exactly. But that’s what I use OneDrive/Dropbox/whatever for.
OneDrive has its own file history completely independent of WIndows File History. Right-click on a file in File Explorer,and click on Version history. It will bring up the revisions and clicking on the vertical elipsis (3 dots), you can revert to that version. I’d make a backup copy of the file before reverting, just in case.